DIY Video Studio is supported by its readers who use the affiliate links or ads on this site. As an Amazon Associate, I earn from qualifying purchases. Thank your support if you use any of the links.
Since the COVID-19 lockdown, video meetings and conferences have become the norm for many businesses and people working from home. But it’s sometimes a poor experience due to bad sound quality.
So how can I improve my Zoom audio settings quality?
- Reduce background room noise.
- Avoid room echo.
- Get close to your microphone.
- Use an external microphone that’s right for you.
- Adjust the Zoom audio settings.

I’ll go through each of these so you can improve the sound on Zoom meetings. So, involve nothing more than changing some of your Zoom settings or the way you prepare for the meeting. Others may involve getting some additional equipment. Where possible I’ve provided links to some affordable audio gear.
In a hurry? If you don’t have much time, here are the four microphones we like that will improve your Zoom audio quality. You can be assured we only choose the best products…
Last update on 2025-10-20 / Affiliate links / Images from Amazon Product Advertising API
Take your Zoom video meetings to the next level by improving your lighting and using a green screen for virtual backgrounds.
Reduce background room noise

Background noise can make it difficult to hear or understand what you are saying.
Some noises you will find difficult to control, such as outside road traffic. But you can avoid other sounds.
Where possible, turn-off or move away from noise sources. These include cooling fans, air conditioning, washer-driers, ticking clocks, and radios. You will be amazed at how loud these seem when you listen with headphones or earbuds.
Family members can also be noisy, but you can ask them to be quiet. Let them know you are about to join a video call but be specific about what you want them to do. They may not appreciate what they are doing is creating noise.
One thing we all forget is our cell phones. Put your phone into airplane mode so you’re not interrupted by calls and notifications.
Avoiding Room echo

Room echo can make it difficult for others to hear and understand you. So, avoid using echoey spaces like empty rooms.
TOP TIP: Avoid using empty rooms with bare walls and floor for your video calls.
Choose a room with a floor carpet or rugs rather than wood or laminate. A room with plenty of furniture, like bookcases, chairs, and a couch is preferable. The irregular soft surfaces will help to minimize room echo.
If you can, hang some blankets or comforters around the walls that will not be seen on camera. They will make the walls less reflective and help reduce the echo.
If you’re in an office you can’t fill it with home furnishings, but acoustic office dividers can help. When you use them to create a cubicle, you will hear a difference in your sound. You can also improvise and use cushions behind your camera to stop sound from reflecting off the wall.
A more professional approach would be to attach acoustic foam panels on the wall in front of your desk. Like the cushions, they will help absorb or disperse sound.
Get close to your microphone

Your sound quality will improve as you get closer to the microphone. As you get further from the microphone your voice will become quieter but the background noise, which hasn’t moved, will remain as loud as before. If you try to raise the audio gain to make yourself louder, you’ll also boost the background noise.
However, by getting close to the microphone you will be louder again, and clearly audible over any noise. So, if you reduce the microphone gain, you will sound perfect, but any background noise, now a little quieter, will be much less noticeable.
The ideal distance between your mouth and the microphone will vary, depending upon the type of mic you use. However, it should never be more than about 2 feet away from your mouth. If using a headset, the distance will be 2 to 4 inches. With a lavalier or clip-on microphone, the distance should be 6 to 10 inches. Meanwhile, professional shotgun mics should be less than 2 feet from the speaker.
Get an external mic for clearer sound
The type of microphone you use will affect how you sound. But you don’t have to rush over to Amazon and buy yourself a professional mic to sound better. Remember what I said above, you want to get the microphone close to your mouth. You’ll sound better with a budget mic that’s the correct distance from your mouth than an expensive mic that’s 6 feet away.
Headset mic
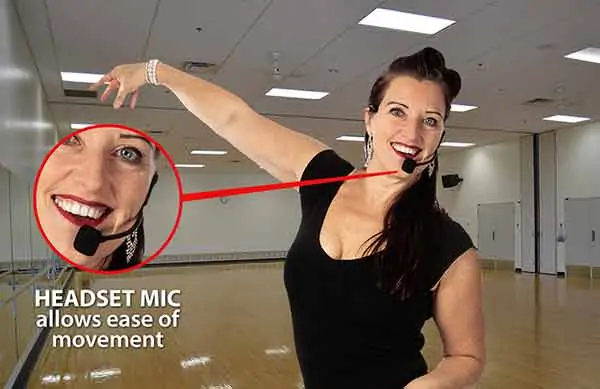
A headset mic can be ideal if it doesn’t matter that the headset can be seen. If your online meetings are business orientated, then a receptionist’s headset would be fine. Even better would be the thin metal wire ear hook type, since they are even more discrete.
Although Zoom is often used for meetings or conference calls it can also be used for remote teaching, such as Yoga or cooking classes or even lectures. A headset mic would be perfect in this case for the person leading the lesson, especially if it is also wireless.
Wired or wireless Earbuds
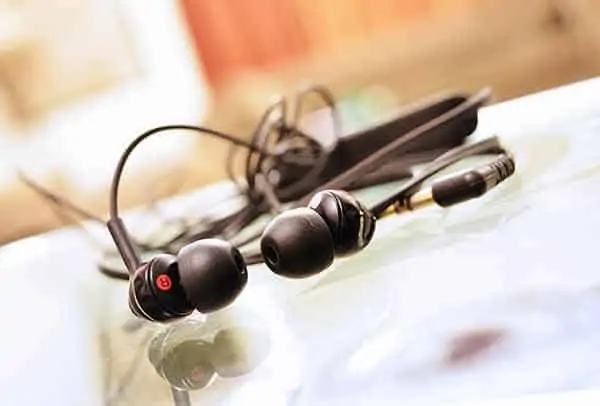
You may already have these since they probably came with your smartphone. The wired variety usually has a built-in microphone in the volume control, whereas the wireless variety normally contains a microphone. The mic quality often isn’t fantastic, but the microphone will be close to your mouth, as we want. However, the audio from the wireless earbuds can have a “compressed” or “processed” quality to it.
Lavalier microphone
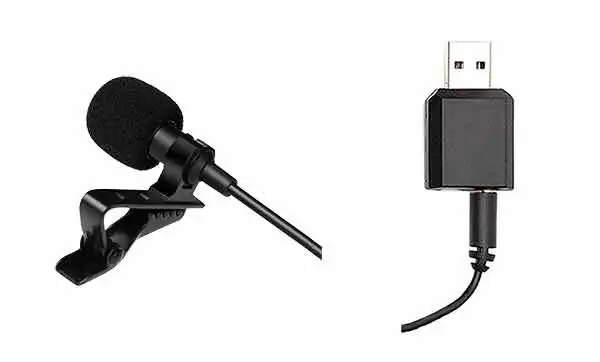
Lavalier microphones are perfect for Zoom calls. Use the crocodile clip, or tie bar, which comes with them to attach them to your clothing. Normally, they are positioned close to the bottom of the breastbone. So, the mouth to mic distance is about 8 – 10 inches. So, although most lavalier mics capture sound equally from all directions, your voice will be the dominant sound.
Although it’s probably unnecessary in most Zoom calls, a lavalier can easily be hidden beneath or between layers of clothing.
If using a desktop or laptop it might be worth looking at the Movo Universal USB lavalier microphone. It’s essentially the Movo LV10 lavalier microphone plus a Sabrent USB sound adapter. Currently, it’s an absolute steal and can be used with your computer and smartphone. To use it with your smartphone for Zoom calls, just forget the USB adapter and plug the TRRS jack into your phone (you may need a TRRS jack adapter for your phone).
I’ve used the MOVO LV10 to record the dialogue for one of my client’s online video courses and think it did a terrific job, and the price is as attractive as the mic. You can click here to find out more on Amazon.
USB Condenser microphone
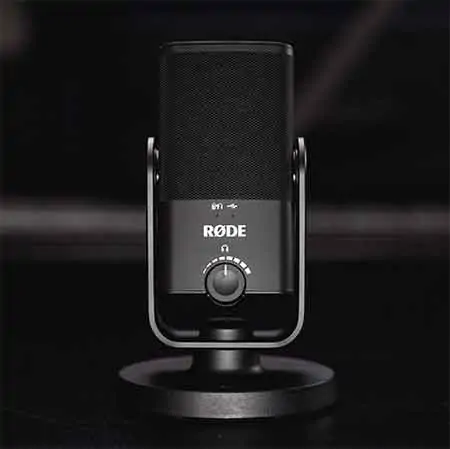
Condenser microphones can be expensive, but there are a few condenser USB mics that are affordable enough for Zoom meetings. The Blue Yeti is hugely popular with many vloggers and podcasters. I would recommend the Blue Yeti to anyone, provided you have additional recording needs, such as capturing great sound for YouTube or podcaster. However, if you just need great sound for Zoom calls there are cheaper options.

The one that stands out for me is the Fifine K669B cardioid condenser microphone. It’s like the Blue Yeti in that it’s a large capsule condenser mic but it only sensitive to sound from one side (it has a cardioid sensitivity pattern). That’s just what you need in a Zoom call since it will reject room noise from behind it. And at about a third of the price of the Blue Yeti, it might be a perfect choice if you want a large desktop mic.
An incredible number of Fifine K669B microphone has already been sold on Amazon alone. You can use this link to see more details on Amazon.
To get even better performance from the microphone check out this bundle on Amazon that includes the Fifine microphone, radio-studio style scissor mic stand, and a pop screen.
To hear how the Fifine sounds and compares to a microphone that costs many more, watch the following video.
Wireless microphone systems
Any mic can also be a wireless or radio mic if you buy a transmitter and receiver set. But you will most often come across lavalier and headset wireless mics.
Not being tethered to your camera or computer by a wire gives you the freedom to move around in front of the camera without the risk of tangles and trips. So, this solution is ideal if you are teaching over Zoom.
The only problem with wireless is those good systems can be expensive. You can get an inexpensive 2.4GHz headset but the ones I’ve tried sound “cheap”.
One system I would be happy to recommend is the Rode Wireless Go. It’s a small wireless system that operates in the license-free 2.4GHz band. The transmitter has a built-in mic, but you can also attach your own lavalier if required. The audio quality is excellent and considering what you get, so is the price is amazing. See the Rode Wireless Go on Amazon.

To see the Rode Wireless Go in action check out this video from Rode about their Wireless Go system.
Adjust Zoom advanced audio settings
Zoom will automatically try to process your audio to enhance the sound. In most cases, this can a benefit, but not always.
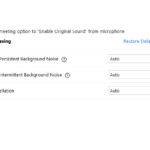
To control the audio enhancement, go to your sound settings and then choose Advanced. You’ll see Zoom can Suppress persisted background noise, such as aircon or fans, and Suppress intermittent background noise, such as doors, tapping keyboard sounds, shuffling chairs, etc. You can choose the level of audio processing that suits you. It can be Auto, Moderate, Aggressive, or Disable. Zoom Echo Cancellation is also available, but you can only choose between Auto and Aggressive.
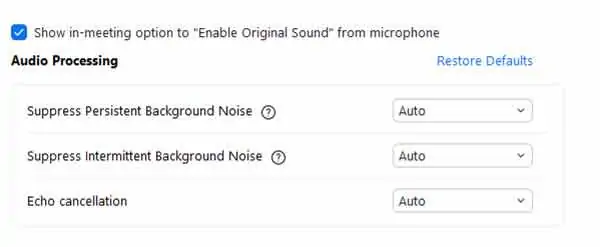
Usually, the enhancements can be useful but sometimes you might want to disable them. For instance, if you are in a noisy or busy office your audio could become quite choppy and the processing tries to reduce the noise. Alternatively, it might be that it is important that your audio remains as unprocessed as possible. This could be the case if you are teaching or taking part in music lessons or a virtual concert or choir.
To disable the audio enhancements, go to the Advanced audio settings and check the box next to “show in-meeting option to ‘Enable Original Sound’ from microphone”. To be certain the processing has been turned off you can also disable Suppress persisted background noise and Suppress intermittent background noise.
You will now be sending audio just as it sounds coming from your microphone. When you return to the main Zoom screen you will see a blue text box in the top left corner that says, “Turn off original sound”. That means the sound you are sending is straight from your mic.
You can also use Original Sound in the Zoom mobile app.
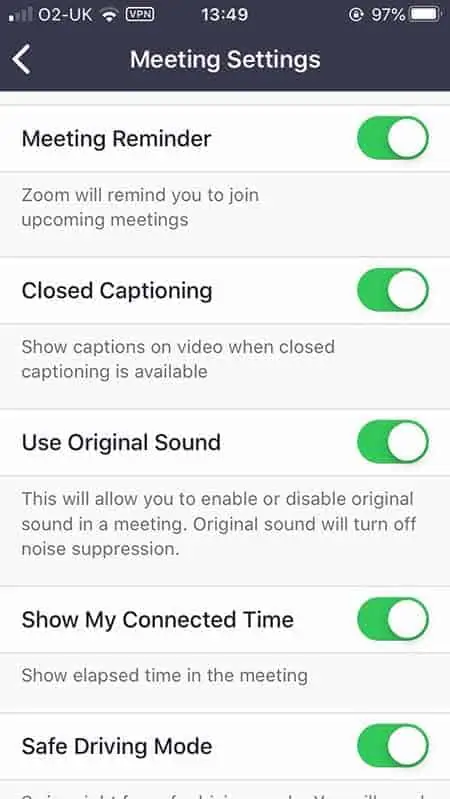
Tap on the Settings icon, and then Meetings. Scroll down to “Use Original Sound” and enable it. Back in the app’s main tap on More in the bottom right corner and from the mini menu that opens choose “Enable Original Sound”.
If you don’t see the option to Use Original Sound, you will need to update the Zoom app to the latest version.
You may also like:
- Can I use my Canon camera as a webcam: Canon Webcam Software
- How to connect a Blue Yeti USB mic to an iPhone
- How do you get the audio from a wireless mic to your editing software?
- Can a wireless mic work with any receiver?
- Best LED lighting for video conferencing: Buyers Guide
- How to hide your messy room in Zoom with Virtual Background
- YouTube Lighting: Best Light Bulbs for Video Recording
- Stop Audio Popping: What is a microphone pop filter and how to set it up
- How do I disable my video camera in a Zoom meeting
- Best Green Screen for Home Office Video Conferencing
- How to avoid glare on glasses in Zoom Video
Related Questions
Can Zoom be audio-only?

You can use Zoom for an audio-only meeting. Create a Screen Share Meeting or start a normal meeting then click on the video camera icon in the bottom left that says Stop Video. This will cut your video feed and show your avatar instead. Alternatively, when joining a Zoom meeting use the check-box next to “Turn off my video”.
How do I reduce background noise in Zoom?
Tosh Lubek runs an audio and video production business in the UK and has been using the Canon EOS R since it was released in the Autumn of 2018. He has used the camera to shoot TV commercials for Sky TV, promotional business videos, videos of events and functions, and YouTube creator content. He has also won international awards for his advertising and promotional work. You can meet by visiting his “video booth” at HashTag business events across the country.
Recent Posts
Most people use sandbags the wrong way. Here’s how to hang them properly on a light stand for maximum stability and safety — plus what to fill them with.
You're Using the Canon RF 50mm f/1.8 WRONG! Here’s How to Fix It
If you’ve recently picked up the Canon RF 50mm f/1.8 STM—affectionately known as the Nifty Fifty—you might be confused by that strange switch on the side of the lens. It doesn’t say AF/MF...


