DIY Video Studio is supported by its readers who use the affiliate links or ads on this site. As an Amazon Associate, I earn from qualifying purchases. Thank your support if you use any of the links.
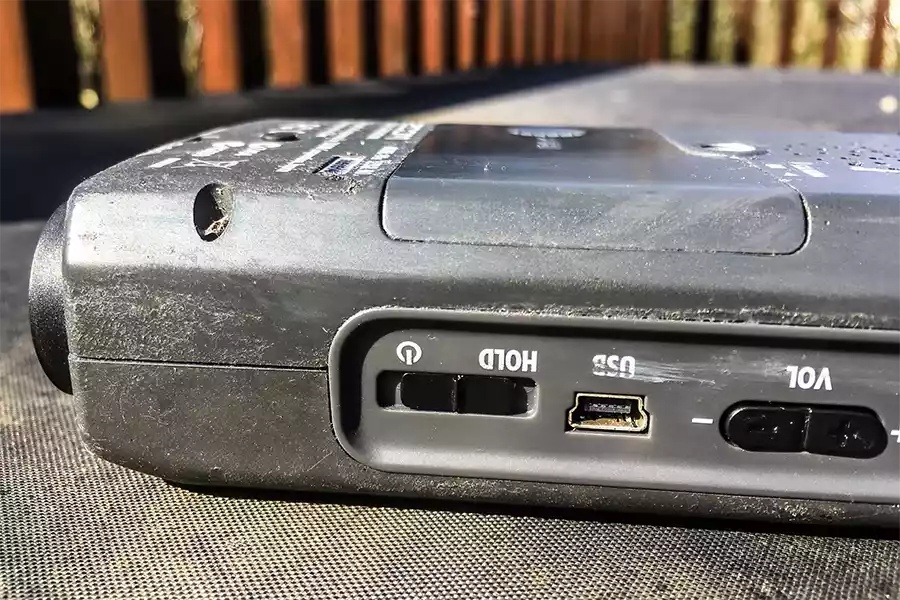
The plastic body of some audio and camera gear is coated with a thin film of rubber. This rubber coating improves the grip, the appearance of the device, and makes the plastic device feel more pleasant to the touch.
However, the rubber film can degrade over time, making the device or equipment feel sticky and unpleasant to handle, and dirt will easily stick to the surface.
A typical example of such a device is the Zoom H4n digital audio recorder. However, the problem, which is called Sticky Rubber Syndrome, can also affect other electrical devices and household products.
If your audio or camera gear has also become sticky, don’t throw it away, because the problem is easy to fix. You just need to know how to remove the sticky rubber texture without damaging the device. I should point out that there does not appear to be any home DIY solution that will turn the sticky rubber back to its brand-new condition. The only real solution is to remove the rubber.
The solution – Removing the sticky rubber
The Zoom H4n sticky rubber coating can be removed using Isopropyl Alcohol and a clean cloth or paper towel. Rub a small area until the sticky rubber coating dissolves and can be wiped away. Repeat using a fresh area of the cloth until all the sticky film has been removed. This should take 10-30 minutes.
You now know the basics of removing the sticky rubber coating. But in a moment, I’ll give step-by-step instructions. But if you want to find out more about sticky rubber syndrome, the solvents to use, what solvents you should not use, and more, keep reading because I go into full details later in this article.
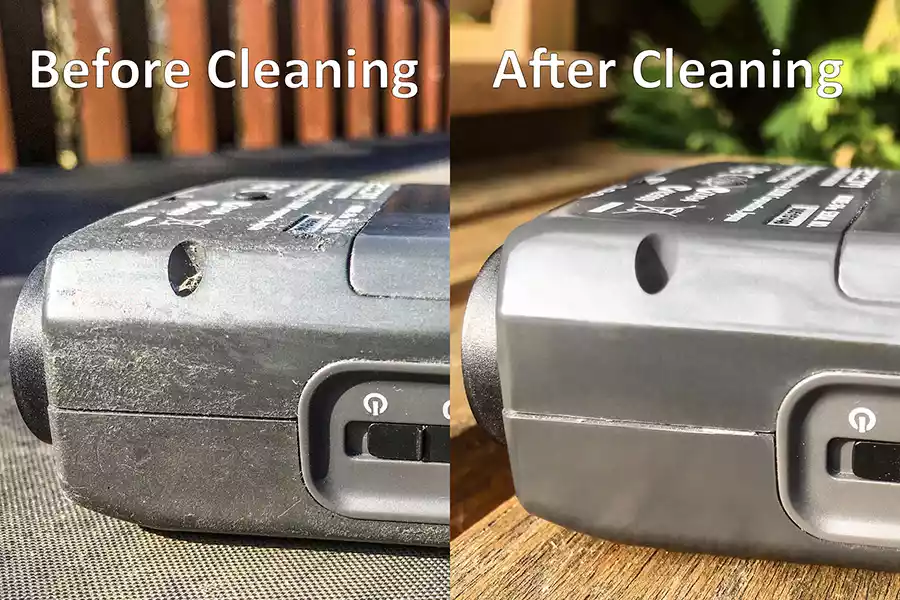
How to clean the sticky rubber film off your camera sound gear
If your Zoom H4n, H4n Pro or H5 have become sticky, here’s how to remove that degraded rubber coating and make the plastic body look clean, attractive, and much more pleasant to handle and use.
However, I would first share something I’ve noticed about cleaning these sticky rubber coatings. The rubber coating is easier to remove when it more fully reverts to its sticky form. So, the stickier the rubber coating, the easier it will be to clean off.
Now, here’s how to clean your device.
Step 1
You’ll need the following:
- Your sticky Zoom H4n or other rubber coated device or product
- A clean microfiber cloth or paper kitchen towel
- A bottle of Isopropyl Alcohol
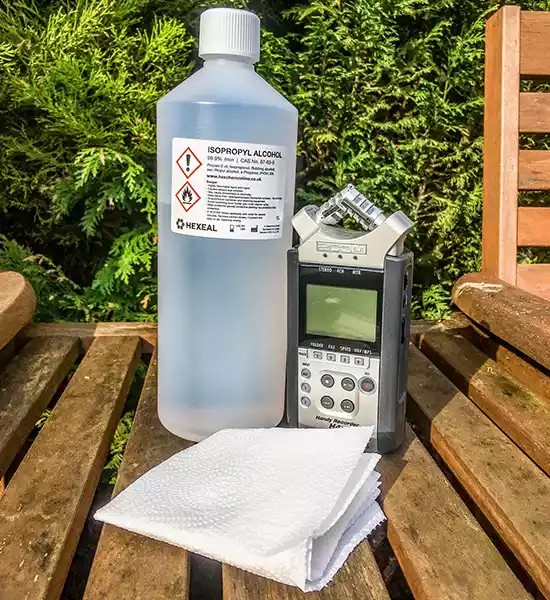
Please note that you will get a cleaner finish by using a microfiber cloth however, you may find that you may need to discard it after use. The paper towel will shed fibers and seemingly make a mess, but you will eventually be able to clean these away.
Step 2
Apply some isopropyl alcohol to your microfiber cleaning cloth or paper towel.
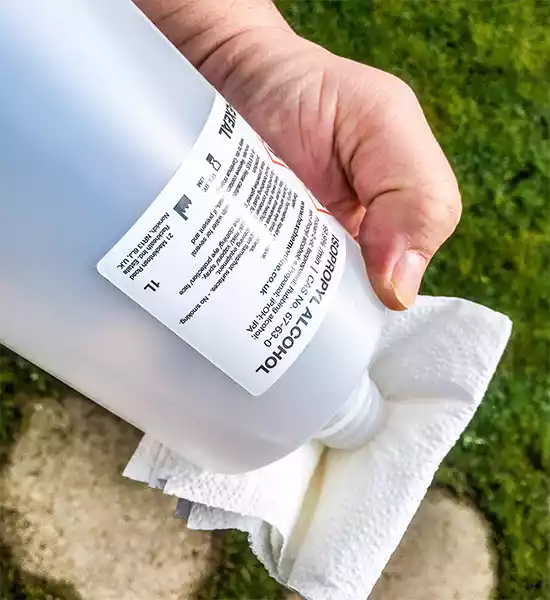
Step 3
Rub a small area of the plastic surface with the alcohol-infused part of the cloth or paper towel. Some of the sticky rubber will transfer to the cloth. When the patch of cloth looks dirty, use a fresh part of the cloth or paper towel. If necessary, apply more alcohol to the cloth.
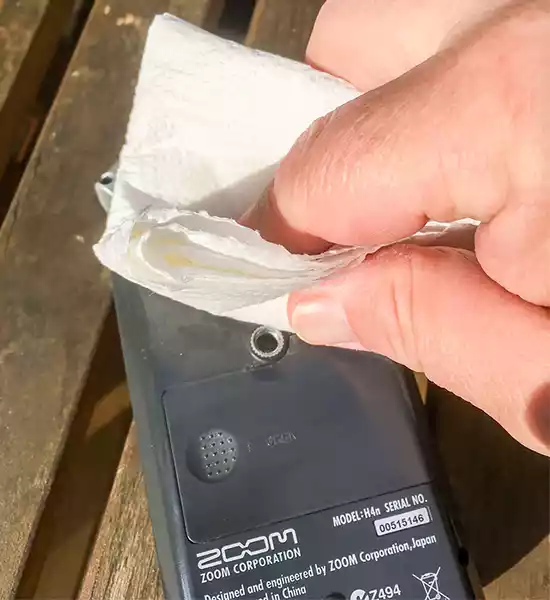
Step 4
When the area of plastic you have been working on is clear of sticky rubber, start working on an adjacent patch of plastic and repeat steps 2 to 4.
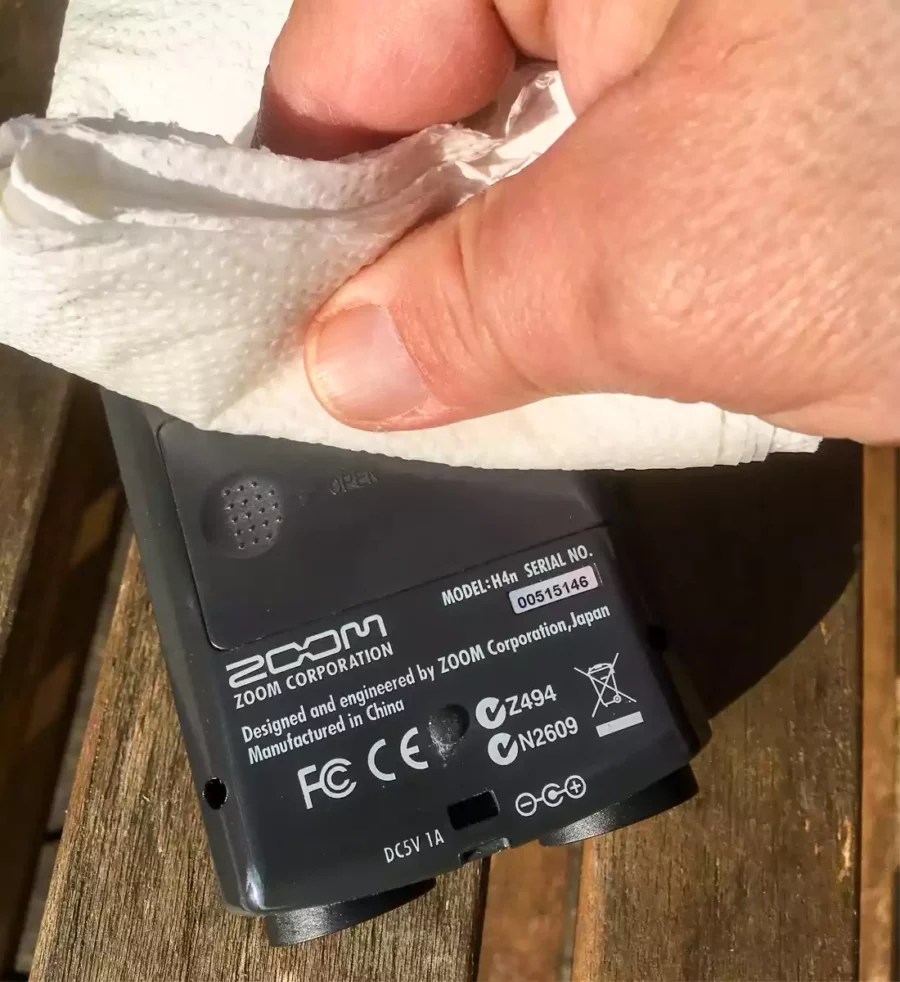
Step 5
If you used a paper towel you may have got some paper fibers stuck in the screw holes or other crevices. Use a wooden cocktail stick and pick out these bits of paper. Then give the device one last wipe over and you are done.
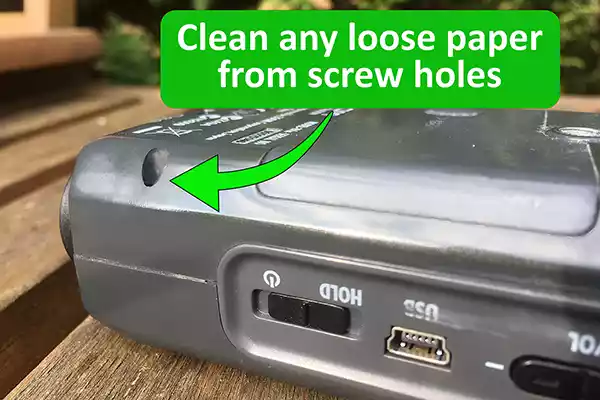
- USP-NF GRADE: Vaxxen Labs 99% Isopropyl Rubbing Alcohol is USP-NF Grade.
- MADE IN THE USA: Trust Vaxxen Labs, which is proudly American made with a transparent supply chain.
- DEMAND 99%: Unlike many products on the market, Vaxxen Labs Isopropyl Alcohol does not contain...
- For External Use Only
Last update on 2025-10-20 / Affiliate links / Images from Amazon Product Advertising API
Final Result
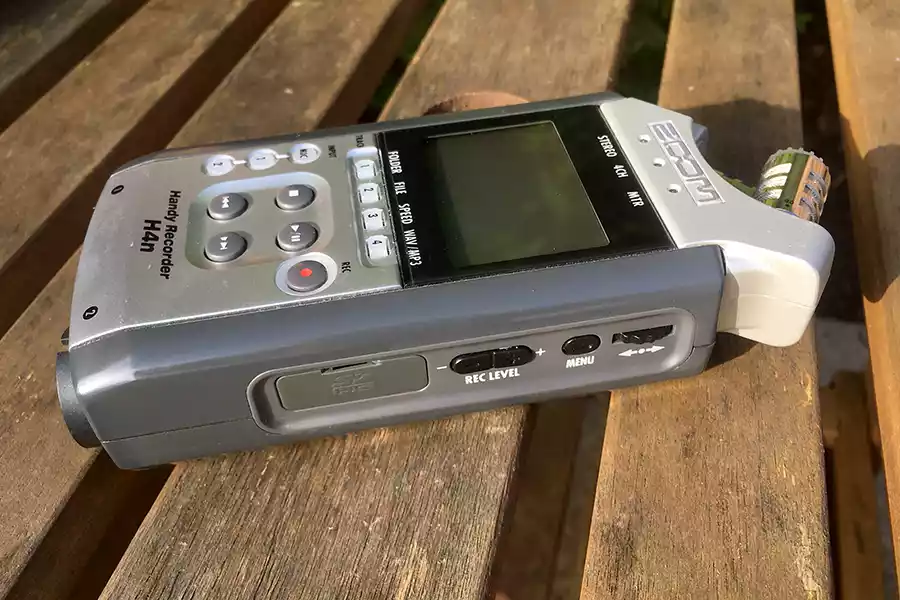
This is the result of 15-20 minutes of cleaning using isopropyl alcohol and a few sheets of paper towel. All the sticky rubber has been removed and the recorder looks and feels perfect again.
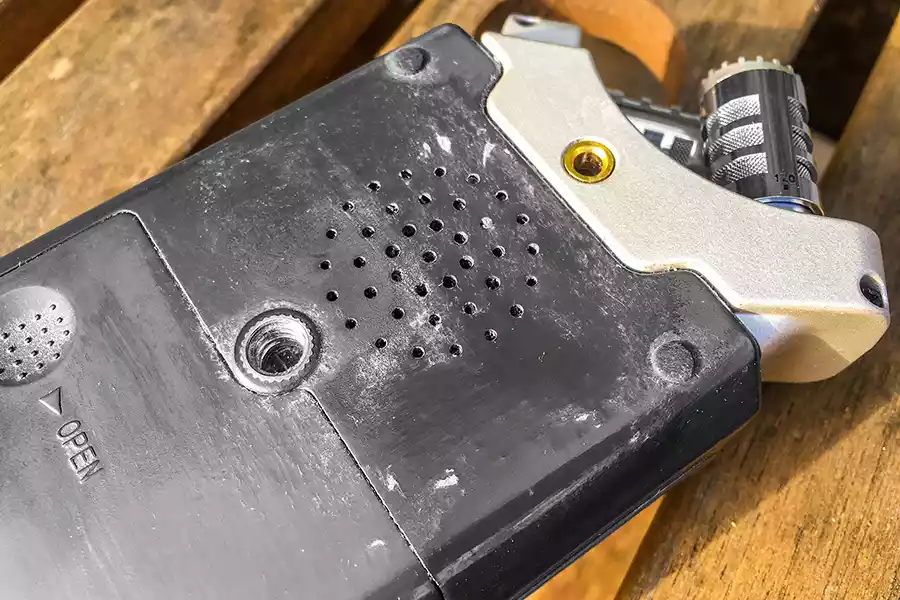
However, in the image below, you can see the test using acetone on the rear of the recorder did not go well. The acetone began to dissolve the plastic body of the Zoom H4n and paper fibers got incorporated into the softened plastic. Once the acetone evaporated the plastic toughened up again but the paper fibers are now a permanent part of the plastic surface.
Although acetone easily lifted the gooey rubber, it is chemically too similar to the plastic body of the recorder, and therefore started to dissolve it.
How long does it take to clean the sticky rubber film?
Once I had all the necessary bits and pieces collected, cleaning my Zoom H4n recorder took no more than 15 minutes. If you want to be thorough and get into every last crevice so your device looks perfect, then set aside about half an hour to get the job done. But honestly, getting your gear looking 95% perfect will probably be good enough. The main reason for doing the clean-up is to stop the device from being sticky, and therefore more pleasant to use.
What is Sticky Rubber Syndrome?
To understand sticky rubber syndrome, you need to know that natural and synthetic rubbers need to be vulcanized to become the hard rubber we are familiar with. However, vulcanization, a polymer curing process, is generally irreversible. So, I suspect sticky rubber syndrome is more of a deterioration of the rubber rather than it truly reverting to its original pre-vulcanized state. Even so, many people talk about the rubber “reverting”.
In sticky rubber syndrome, the deterioration begins on the outer layer of rubber and gradually progresses through the rubber coating. As the deterioration progresses the layer seems to get stickier. If the deterioration has progressed throughout the rubber coating it is much easier to remove the rubber. Almost any organic solvent or household cleaning agent would easily remove the rubber gooiness. However, areas that have not deteriorated completely will be more difficult to remove.
Can Sticky Rubber Syndrome be Fixed?
You will find several DIY fixes on YouTube and online to sticky rubber syndrome. However, none of them seem to return the rubber coating to how it was when the product was “brand new”. They are more like workarounds.
I have seen suggestions that you can cover the device in Saran wrap (cling film in the UK) but that seems highly impractical and unsightly.
Another more successful suggestion is to sprinkle talcum powder onto the rubber and work it into the sticky rubber. Although this may stabilize the gooey rubber coating it doesn’t make it look or feel like new.
It would seem the best solution to sticky rubber syndrome is to remove the degraded rubber coating using an organic solvent.
What equipment is affected by Sticky Rubber Syndrome?
Sticky rubber syndrome affects many devices, not just Zoom digital audio recorders. If you have something that’s made from plastic and coated with a thin layer of rubber, there’s a chance the rubber might revert to its original sticky state.
I have had it happen to a gaming joystick, computer mouse, electric hand drill, flashlight, and of course my Zoom recorder.
I know the problem can affect the H4n, but my research has revealed that sticky rubber syndrome can also affect the Zoom H4n Pro and H5 recorders, the Edirol Roland R-09HR high-resolution sound recorder.
The truth is, if you have a plastic item or device that has a rubberized surface coating, then there is a chance the rubber will revert and become sticky.
The correct solvent to clean off the sticky rubber coating on audio or camera gear
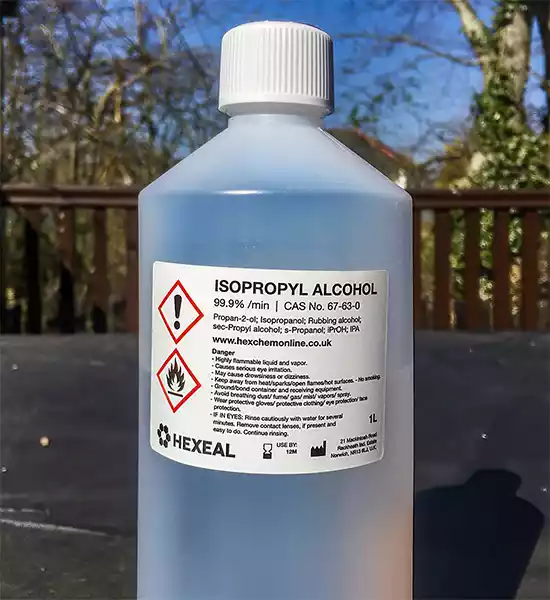
To clean the sticky rubber off audio or camera gear, we need a suitable organic solvent. The one I recommend is 100% pure Isopropyl alcohol. The one I used states it is 99.9% minimum Isopropyl alcohol, which effectively is 100% pure.
You may also know Isopropyl alcohol by an alternative name, such as rubbing alcohol. However, not all brands of rubbing alcohol are 100% isopropyl alcohol. Some have a lower concentration of alcohol due to the addition of water and perhaps other chemicals.
If you’re cleaning electrical items, you don’t want to be applying a cleaner with water in it. Pure isopropyl alcohol will evaporate quickly at room temperature and not cause damage to electronic components.
The advantage of using isopropyl alcohol is that it will dissolve and lift the sticky rubber film without dissolving the printed text on the body of the device. You can see in the following image I have cleaned the sticky film on the plastic, but the white printing has remained intact.
Update for readers in the EU and UK
A reader from the Netherlands contacted me to say that isopropyl alcohol is not easy to come by in his country. However, chemists in the Netherlands do sell Denatured Alcohol, where the bottles say they contain “Alcohol denat.”. According to Wikipedia, the European Union agreed in 2013 that denatured alcohol would be a mixture of ethanol, isopropyl alcohol, methyl ethyl ketone, and denatonium benzoate.
My reader reported he bought 96% Denatured Alcohol from a chemist and used it to unstick the rubber coating on his Zoom H4n. He said, “it worked like a charm”.
In the UK and Ireland denatured alcohol is also known as methylated spirits and is dyed purple. I have tested rubbing some “meths” on the plastic body of my Zoom recorder and can report there were no harmful effects.
Which chemicals and cleaners NOT to use
There are many solvents you might consider for removing the sticky rubber on your audio or camera gear. But it’s vitally important that you use the correct one, as suggested above. Some of the ones below might work but they are not recommended.
DO NOT USE Water-based cleaners – Water might penetrate the device and damage the electrical components.
DO NOT USE Household Cleaners – Chemical cleaners, like Windex and Hydrogen Peroxide, should be avoided. Apart from possible chemical damage to the electronics, the chemicals might cause damage or discoloration to the plastic body.
DO NOT USE Acetone – Acetone, commonly used as nail polish remover will easily remove the sticky rubber, but please DO NOT use it on devices with plastic bodies, such as the Zoom H4n digital audio recorder. The sticky rubber residue will come away with one or two wipes, but the acetone might also dissolve, or melt, the plastic.
Affected plastics include PVC, CPVC, polystyrene, PVDF, polycarbonate, polysulfone, and cast acrylic. Since you are unlikely to know what plastic your device is made of, play safe and do not use acetone.
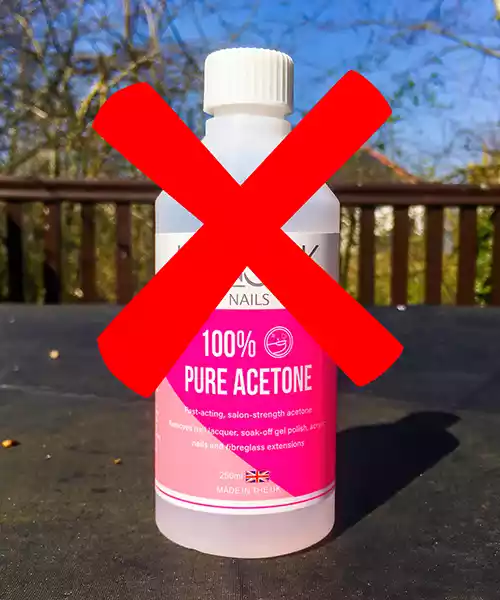
If you do use acetone this is the likely result (image below). This is the back of my H4n audio recorder. The acetone started to dissolve, softened and smeared the plastic. Paper towel fibers also became incorporated into the softened plastic and became fixed once the acetone had evaporated. Finally, the acetone also removed the printed lettering on the H4n recorder.
DO NOT USE Trichloroethane or Trichloroethylene – These organic solvents, often used as degreasing agents, should not be used. Exposure to solvents can involve health risks. They have also been linked to damage to the ozone layer.
DO NOT USE Gasoline – Gasoline, as well as a fuel, can be used as an organic solvent and is sometimes used to degrease engine components in workshops. However, avoid using it to remove sticky rubber on your device. First, inhaling the fumes is undesirable and the vapor can pose a fire risk or even cause an explosion.
DO NOT USE WD40 or ArmorAll – Both these products have been recommended online. However, although WD40 may remove really gooey rubber coatings it tends to leave an oily residue on the surface. A Youtuber suggested using ArmorAll, however, he said it took “several hours” to remove the rubber coating from his Zoom H5 audio recorder. I suspect the extended length of rubbing was a greater factor than using ArmorAll.
Where should you clean your audio or camera gear?
When cleaning the sticky rubber film off the plastic body of your devices, such as a Zoom H4n or H4n Pro, chose a well-ventilated spot. Cleaning your device will take 15-30 minutes. That means you could expose yourself to alcohol fumes for a long time. You should avoid breathing in the alcohol vapor since it might cause drowsiness or dizziness.
I would always open windows and doors to cause a through draught. This will prevent the accumulation of alcohol fumes, which are also a potential fire risk. An alternative is to clean your device outdoors, where the breeze will carry away the fumes.
Source: 1
Tosh Lubek runs an audio and video production business in the UK and has been using the Canon EOS R since it was released in the Autumn of 2018 and the Canon EOS R6 in 2020. He has used both cameras to shoot TV commercials broadcast on Sky TV, promotional business videos, videos of events and functions, and YouTube creator content. He has also won several international awards for his advertising and promotional work. You can meet him by visiting his “video booth” at HashTag Business Events across the country.
Recent Posts
Most people use sandbags the wrong way. Here’s how to hang them properly on a light stand for maximum stability and safety — plus what to fill them with.
You're Using the Canon RF 50mm f/1.8 WRONG! Here’s How to Fix It
If you’ve recently picked up the Canon RF 50mm f/1.8 STM—affectionately known as the Nifty Fifty—you might be confused by that strange switch on the side of the lens. It doesn’t say AF/MF...


