DIY Video Studio is supported by its readers who use the affiliate links or ads on this site. As an Amazon Associate, I earn from qualifying purchases. Thank your support if you use any of the links.
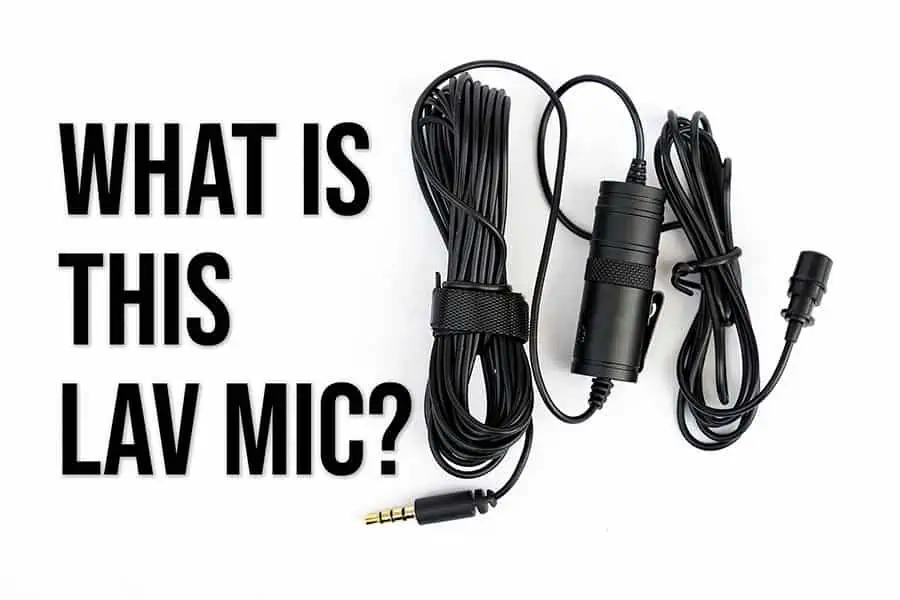
I am a professional audio and video producer, and I use Sennheiser and Audio Technica wireless microphones for my client videos. However, I also have some cheaper wired lavalier microphones in my kit bag, and these include the MOVO LV1, BOYA BY-M1, and Vidpro XM-L lavalier condenser microphones. They all look astonishingly similar. So, what is the difference between them?
Have they rebranded the same microphone?
Except for the branding, the BOYA BY-M1, MOVO LV1, and Vidpro XM-L lavalier condenser microphones all look alike. They have a microphone capsule at one end, then 5ft (1.5m) of cable, then a battery compartment with switch, followed by another 15ft (4.5m) of cable, and finally a 3.5mm 4-pole (TRRS) jack plug.
If you take a close look at the control and battery pack, the only difference seems to be the branding. Although the packaging isn’t identical, the feature and specification text is almost word-for-word identical, at least for the MOVO and BOYA microphones. Here is the back of the MOVO and BOYA packages for comparison. For full transparency, I bought the MOVO in 2016 and the Boya in 2021.
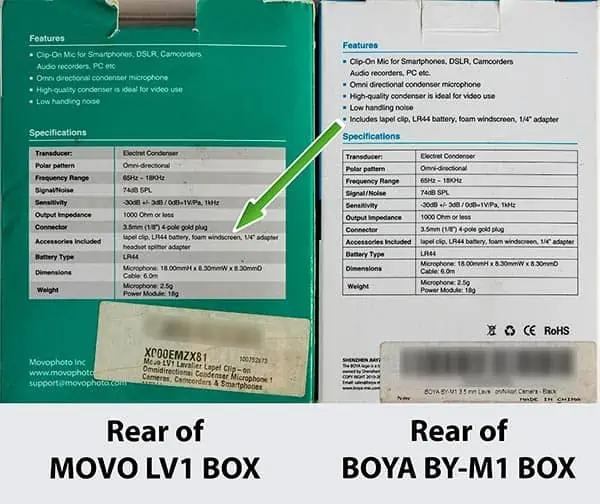
When I used these two mics, to my ear, both also sound the same. So, in my experience, the MOVO LV1 and BOYA BY-M1 seem to be the same microphone.
Now, if we assume the MOVO and BOYA mics are basically the same, what about the Vidpro XM-L? Here we do not even need to compare the microphones, because the Boya BY-M1 listing on Amazon, actually states that the microphone in the box is a “Vidpro XM-L Wired Lavalier microphone”.

So, as far as I can tell, all three lavalier microphones are the same, but with different branding. This being the case, they should all operate in the same way. Although there might be a difference in the included accessories.
What comes in the box
Here is an image and a list of what is included in the box. Depending on when you bought your microphone, the content may be in a molded plastic inner tray or in a soft carry pouch.
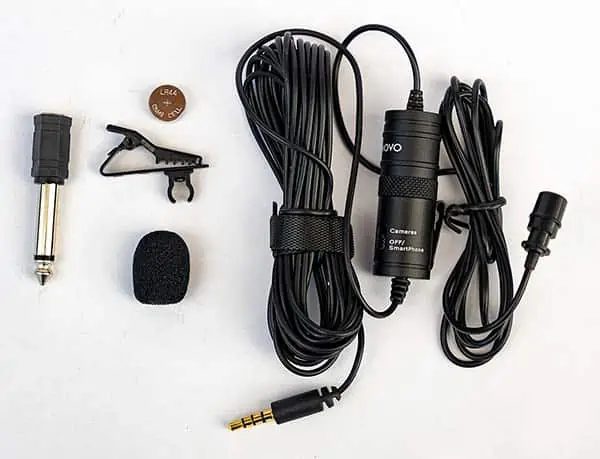
Box contents
- Wired microphone with integrated battery pack
- LR44 alkaline button battery
- Microphone clip
- Foam windscreen
- 3.5mm to ¼ inch plug adapter
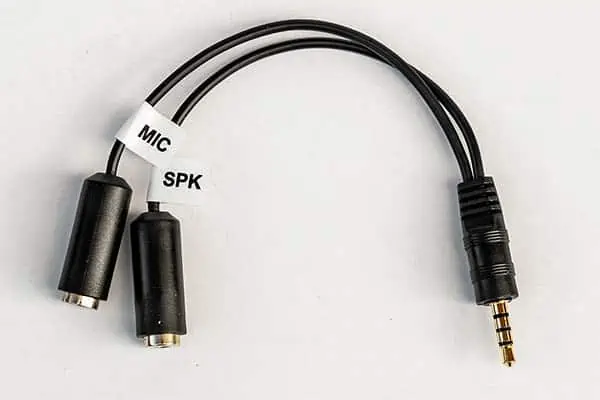
NOTE: When I bought my MOVO LV1 it also included a Y splitter/adapter (shown below) to enable smartphone headphone monitoring without having to unplug the microphone. However, the latest online listings do not mention it anymore. I assume this is because newer smartphones no longer have a headphone socket.
Microphone description
This is an omnidirectional wired lavalier electret condenser microphone, with a reach of up to 20ft. Everything is black, which helps if you need the microphone to look discrete when clipped to your subject’s clothing.
The cable is 20ft (6m) in total. About 5ft from the mic capsule there is an inline battery compartment with a control switch. You then have another 15ft (4.5m) of cable, which terminates in a 3.5mm TRRS jack plug. The cable is thin and flexible, but because it is so long, it is liable to tangling up.
The mic capsule snaps into the mic clip holder. The clip is metal but the part that holds the microphone is plastic. Be careful when pushing the mic into the plastic holder, I manage to snap the plastic, however, you can easily buy replacement clips online. The battery compartment takes a single 1.5V LR44 alkaline button cell battery, and the side of the unit has a control switch. Finally, the cable ends in a straight 3.5mm 4-pole TRRS jack plug.
The battery compartment has a sliding switch but that is both an on/off switch and reconfigures the output, effectively changing the 3.5mm jack between a TRRS and TRS jack.
The microphone battery and how to fit and remove it
The Boya/Movo/VidPro mic takes a single 1.5-volt alkaline LR44 button battery, that has a capacity of 150mAh. It has a physical size of 11.6mm in diameter and 5.4mm in thickness.
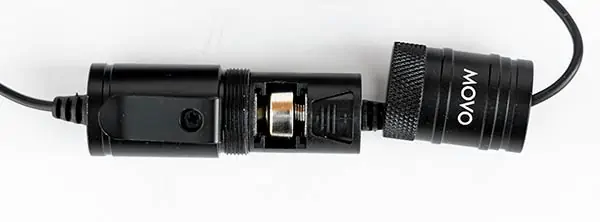
To install or remove the battery, open the battery compartment by unscrewing the end with the printed logo. You only need thumb and finger pressure; hand tools are not required. The top will make seven full rotations before it can be slid to one side to reveal the battery compartment.
The positive contact is on the side close to the end, the negative terminal is on the side close to the sliding switch.
Battery fitting and removal can be a little tricky at first because of the length of the sprung contact. I found that inserting the battery at a slight angle that slopes away from the spring, works well. Alternatively, a thin blunt blade can be helpful. Use it to compress the spring, so the battery can slip into place. The blade can then be withdrawn, leaving the battery in place, although you may need to hold the battery in place with your thumb to stop it from coming out.
Removal of the battery can be done by placing the tip of the blade down between the side of the battery and the battery compartment, then levering the battery out.
Once you have finished, slide the metal cover back over and screw it into place.
MOVO LV1 and BOYA BY-M1 mic test
I have recorded a couple of samples using the MOVO LV1 and BOYA BY-M1. I have not provided a sample recording for the Vidpro XM-L microphone since the BOYA BY-M1 online listing clearly states that it is a VidPro XM-L microphone. Therefore the BOYA BY-M1 sample also serves as the Vidpro XM-L sample.
Both samples were recorded on a Zoom H4n handy recorder and then normalized in Adobe Audition to a loudness target of -23 LUFS (the European broadcast loudness standard).
Using the microphone with a smartphone, camera, and audio recorder
This is a universal microphone. It will work with almost any recording device with a 3.5mm or ¼ inch mic input. That includes DSLR/Mirrorless cameras, audio recorders like the Zoom handy recorders, computers, sound boards, audio interfaces, and smartphones.
How to use the Boya/MOVO/VidPro microphone with a smartphone
For smartphones that still have a headphone socket, plug the microphone jack straight into the headphone socket.
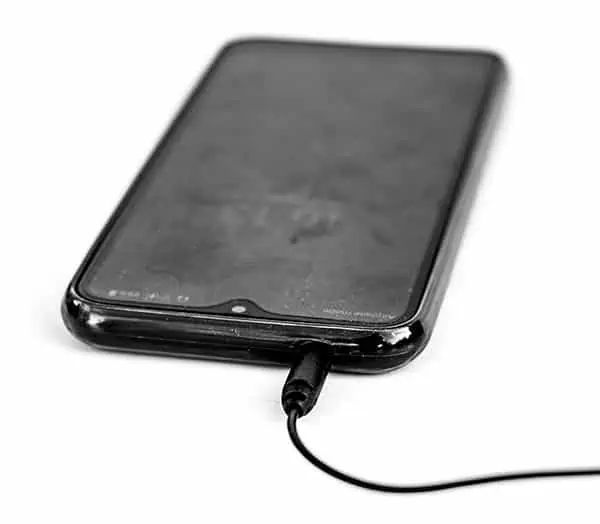
For more modern smartphone designs that have a USB-C or Apple Lightning socket use a USB-C headphone adapter or an Apple Lightning headphone adapter. Insert the headphone adapter into the phone’s port, then plug the microphone’s jack into the adapter.
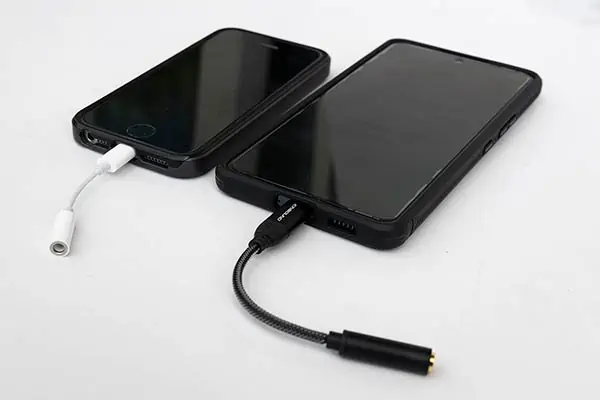
I have included links below to the adapters I have bought from Amazon and have found to work well.
Last update on 2025-04-14 / Affiliate links / Images from Amazon Product Advertising API
Insert a headphone adapter for your type of smartphone into the phone’s charging port, then insert the microphone’s 3.5mm jack into the adapter. Next, slide the switch to the OFF/Smartphone position, and finally, open the recording app you want to use and start a new recording.
The microphone audio should record as dual mono or the same mono signal on both the left and right channels.
You can have the microphone switch in the OFF position because the port on the smartphone or tablet supplies the power.
Using Camera mode to record to devices with a 3-pole or TRS socket
Camera mode covers most non-smartphone or tablet devices that do not supply plug-in power to the microphone. This includes DSLR/Mirrorless cameras, camcorders, Zoom handy recorders, sound boards, etc.
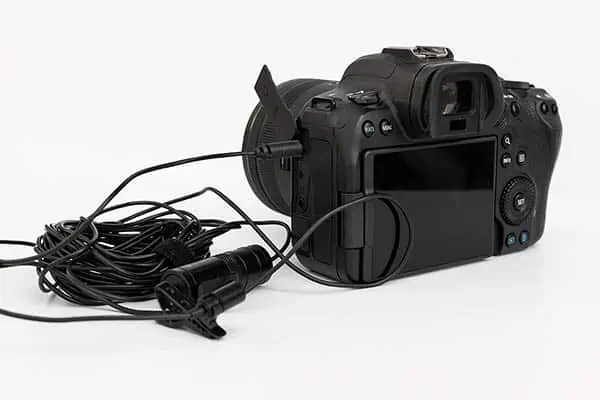
Insert the microphone’s jack into the mic input of your recorder. Move the switch to the Camera position to turn on battery power and reconfigure the connections on the jack from 4-pole TRRS to 3-pole TRS connection. Finally, start recording. It will record dual mono, with the same signal on both tracks.
Recording to a device that can provide plug-in power
Some devices can supply what is known as plug-in power. This allows condenser microphones that are not self-powered to function as expected. Since the VidPro XM-L mic (aka MOVO LV1 and BOYA BY-M1), is self-powered, you might be wondering why I’m mentioning this.
It’s because the microphone can also use plug-in power, which is handy if the LR44 battery has run down or isn’t even fitted in the battery compartment. In fact, because the microphone does not have a way of monitoring the battery life, you might prefer to record with plug-in power from your recorder. This ensures the microphone battery will not fail during a recording.
To use plug-in power with the microphone you will need an adapter, and there are two that you can use.
These adapters can be tricky to find, but I have included links to the ones I bought on Amazon and found to work well.
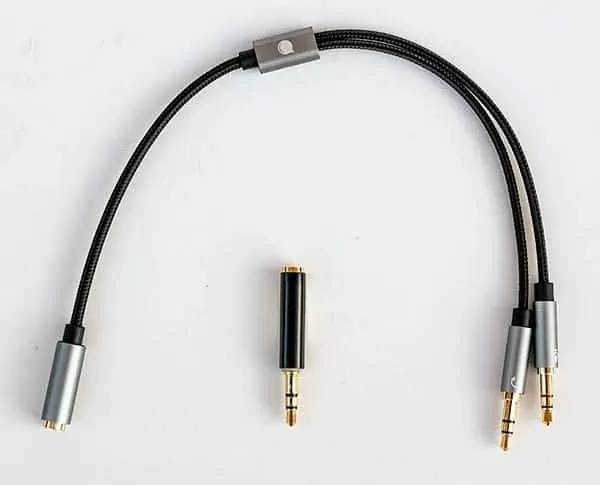
To use the microphone with plug-in power, do the following.
Insert the adapter into the recorder, then insert the microphone jack into the adapter. Next, make sure the slider switch is in the OFF/Smartphone position. This bypasses the battery, which is why you don’t need a battery in the mic’s battery compartment. Finally, start the recording on your device.
If using the TRRS to TRS adapter your device will record dual mono. However, if you use the headset Y-splitter adapter you may find that the audio is only recording on one track. If this is the case, you may be able to configure your device to record a mono mix to both tracks.
Final thoughts: who are these microphones for?
If you need to record natural and full-sounding audio for broadcast TV or an important paid corporate interview, this microphone is not for you. However, many professional videographers may have one in their kit bag as a backup or where the microphone is at risk of being damaged or destroyed.
This microphone is cheap and targeted at amateur and enthusiast video creators who need a lapel mic that sounds “good enough” and works with almost any type of recorder. It may not sound like a professional Sennheiser ME-2, but for around $15 or less, it’s phenomenal value for money, and it can’t be ignored.
Unless you record side-by-side with another mic, like the Sennheiser ME-2, your viewers probably won’t notice the difference in sound quality. But you will notice the difference in price. For most recordings, these mics will be good enough, especially for online videos.
Also, if you can’t afford a wireless microphone, the 20ft cable makes these mics a potential alternative. You’ll be able to record in many situations where a wireless mic would normally be used but at a fraction of the cost. The downside is that a trailing cable might get in the way or get tangled.
However, if you are just starting out or don’t want to spend much money, this could be the lavalier microphone for you, whatever the name is on the box.
Last update on 2024-03-10 / Affiliate links / Images from Amazon Product Advertising API
You might also like…
- How to Use a Zoom H4n to Record Pro Audio in 12 Easy Steps
- How to Power a Zoom H4n Recorder with a Power Bank
- Stop Audio Popping: What is a microphone pop filter and how to set it up
Tosh Lubek runs an audio and video production business in the UK and has been using the Canon EOS R since it was released in the Autumn of 2018 and the Canon EOS R6 in 2020. He has used both cameras to shoot TV commercials broadcast on Sky TV, promotional business videos, videos of events and functions, and YouTube creator content. He has also won several international awards for his advertising and promotional work. You can meet him by visiting his “video booth” at HashTag Business Events across the country.
Recent Posts
Recently, I shot several customer testimonial videos in 4K for a client when the overheating warning on my Canon EOS R6 appeared. In fact, it appeared three times in five sessions during the day of...
Why Every Photographer Should Have a Nifty-Fifty 50mm f/1.8 Lens
If there’s one lens nearly every photographer should own, it’s the 50mm f/1.8 - better known as the “nifty fifty.” This affordable lens provides impressive quality and versatility, making it...


