
DIY Video Studio is supported by its readers who use the affiliate links or ads on this site. As an Amazon Associate, I earn from qualifying purchases. Thank your support if you use any of the links.
Today I’ll explain what’s that fuzzy thing on a microphone is, and why it’s used on movie and television sets. As a bonus, I also show you how to make one in just a couple of minutes or less!
I use microphone windscreens all the time to improve the audio quality when shooting videos for my clients and my own tutorial and YouTube videos. You can use a DIY nic windscreen to significantly improve the sound in self-recorded marketing videos, vlogs, and YouTube videos.
IN A HURRY TO MAKE A DIY MIC WINDSCEEN? Jump ahead to my step-by-step tutorial (with images and video) click here. It’s cheap, is simple to make, and it really does work. Better still, there’s no sawing or gluing required. This DIY mic windscreen will dramatically improve your recordings.
So, let’s get going.
So what is the fuzzy thing on a microphone?
The fuzzy thing on microphones that you often see on movie and television sets is a windscreen or windshield. The design reduces or eliminates the wind noise or thumping blasts caused by the wind hitting the microphone.
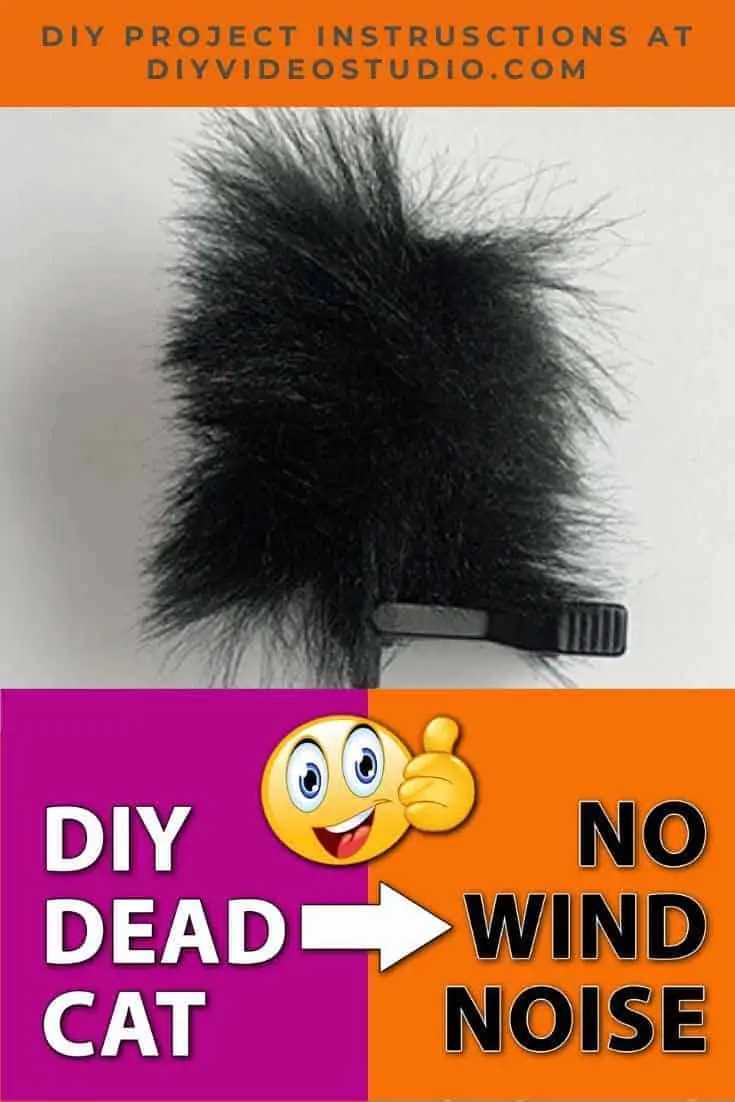
It often goes by other names. These include dead cat; dead kitten; wind muff; wind muffler; and windjammer.
What is wind noise?
Wind noise is the rumble and random blasts and thumps produced by fast-moving air buffeting the microphone capsule (or near it).
Wind hitting or moving across the microphone capsule and tube slots cause air turbulence. It’s that turbulence that results in the wind noise.
The wind noise is mostly very low-frequency sound. Most of the wind’s energy is in the 10-100Hz frequency range.
However, wind noise also has higher frequency components, but these carry less energy and are much more easily stopped.
Source: Wikipedia![]()
So wind noise appears significantly in the bass. It literally sounds as if the wind is battering the microphone. In the process, it can obscure the sounds we do want to hear.
Listen to an example of wind noise recorded in my yard.
Shooting video outdoors and recording good quality sound on a windy day can be a challenge. However, those fuzzy microphone windshields or “dead cats” can dramatically reduce wind noise.
What does the fuzzy thing on a microphone do?
Since wind noise is caused by turbulence at the surface of the microphone, reducing that turbulence will reduce the noise.
Surrounding a microphone with artificial fur that is about an inch long is a good way of reducing the turbulence that causes wind noise
The artificial fur fibers produce micro-turbulence at the surface of the dead cat and this helps to silently absorb the wind energy.
While the fibers are a roadblock to the low frequencies, they are almost invisible to the higher frequencies we want to hear. The sound is transmitted efficiently past the fur fibers, but depending on the backing material some may be absorbed by the material.
Simple dead cat designs may just be a sleeve of artificial fur surrounding the microphone. More advanced arrangements may include open cell foam between the artificial fur and microphone.
Increasing the distance between the outside of the dead cat and the microphone capsule helps to reduce the wind noise further. This explains why the mic fuzzy thing (windshield) you see on movie sets is typically four or five inches from side to side.
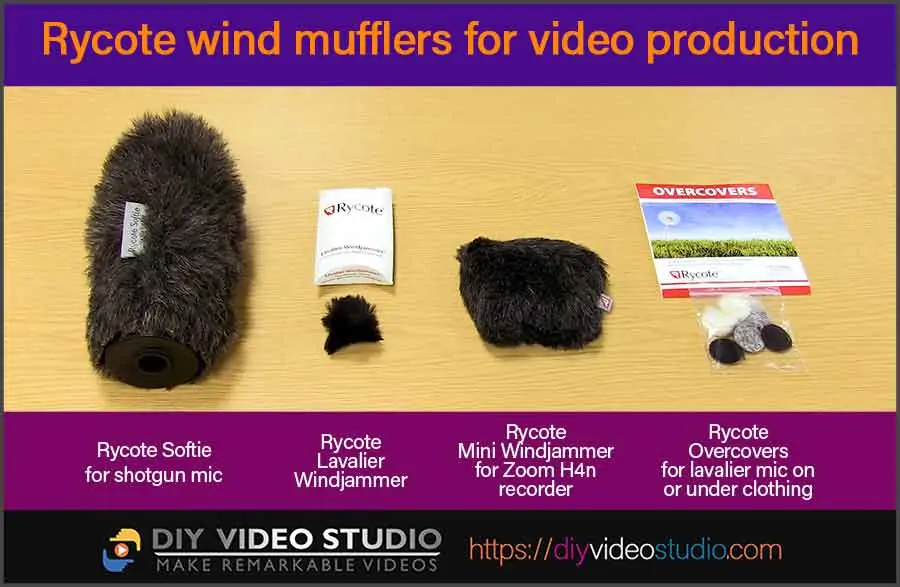
Dead cats are available for most types of microphones, from lavalier (lapel) mics right up to large shotgun mics.
In the image below, you can see some of the wind protection I have in my audio kit bag.
However, dead cats, or those mic fuzzy things, aren’t the only windshields available. I mentioned open cell foam can be used to move the fur of a dead cat away from the microphone. It can also be used on its own in a type known as a microphone foam windshield.
What are microphone foam windscreens?
Foam windscreens slip onto a microphone and provide some protection against very light wind noise, and pops or plosives in speech.
Cheap foam microphone windshields are often made from thin and single-type acoustic foam. They provide only a little protection against wind noise. In my opinion, they mostly protect the microphone from spittle.
More expensive models are made from durable open-cell acoustic foam, sometimes comprising different foam cell sizes. For example, the Shure A81WS large windscreen is designed for the Shure SM81 and SM57 microphones.
Rycote foam windshields offer up to 20 dB wind noise attenuation, whilst keeping high-frequency loss to a minimum.
Rycote website
Making a DIY dead cat mic windscreen
Making my design of a DIY dead cat mic windscreen for a lapel or lavalier microphone is much quicker than you might think.
It doesn’t require you to have any sewing skills because this project requires no sewing.
You’ll be surprised at what I use instead of stitching or glue.
Choosing artificial fur for the dead cat
The material used to protect the microphone from the wind is specially designed. It has to stop the low frequencies in window noise but be as transparent as possible at higher frequencies. These higher frequencies cover the band that’s typical of the human voice or whatever we want to record.
If the thickness of the backing material is increased it will reduce more of the wind noise but also impede some of the sound you want, especially the higher frequencies. So be wary of choosing some fur that has a thick backing.
I obtained a small quantity of suitable artificial fur from a toy supplies seller on eBay. But you might be able to recycle an old toy or even get a free off-cut from a local shop.
The best fur length to choose for a DIY dead cat or mic fuzzy thing
The length of the fur fibers should be half to one inch long. This length is ideal for a lapel mic fuzzy thing or dead cat since it helps to keep the windshield discreet when worn.
Longer fur would make the mic capsule look as if it’s hidden within a pompom and be distracting for the viewer.
The fur fibers should not lay flat on the backing material. If possible, they should almost stand up from the material.
Avoid fur that tends to mat together. This would reduce the effectiveness of the dead cat and reduce higher frequencies.


Last update on 2025-10-20 / Affiliate links / Images from Amazon Product Advertising API
Making a DIY dead cat lapel mic windshield/windscreen
Here is the 8-step process to make a DIY Dead Cat windscreen in under 5-minutes. You will need a small amount of artificial fur, a pair of scissors, and an office stapler.
Step 1 – Gather your materials
Gather together everything you will require. This will be a small amount of artificial fur from a toy supplies shop. A good pair of scissors. And an office stapler.
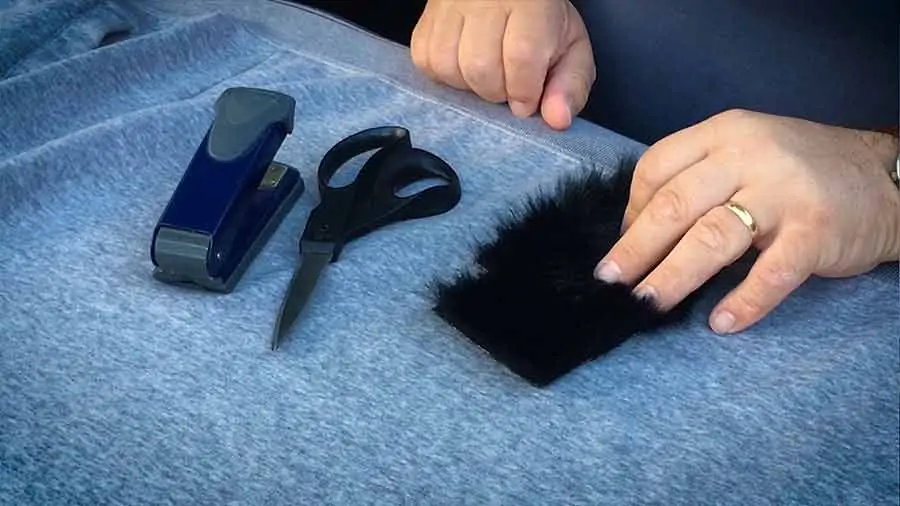
Step 2 – Cut a small square of artificial fur
Turn the fur material upside down. Use the lines in the material’s weave as a guide to cut a straight line. You want to cut a square of fur material. The actual size will depend on the size of your lapel mic capsule.
I’m using an Audio-Technica ATR 3350 lavalier microphone. So a square of material that is about an inch and a quarter on each size is about right.
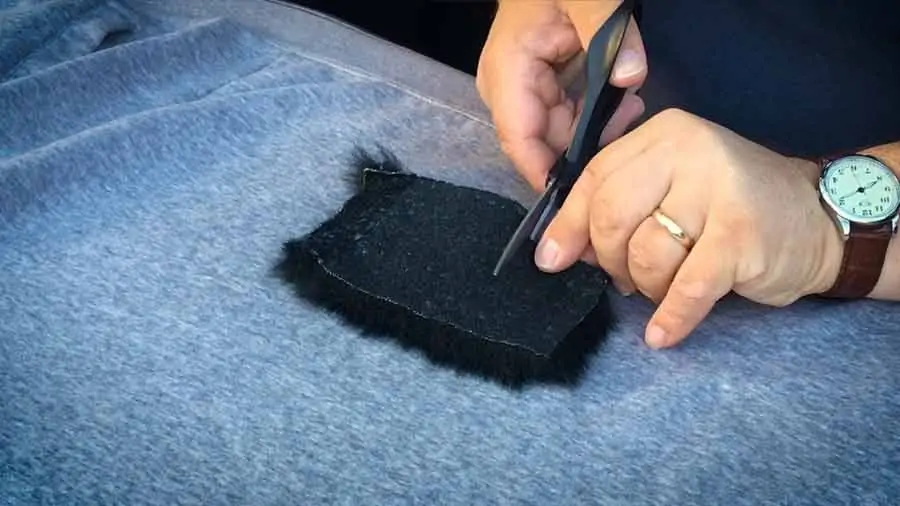
Step 3 – Pick-off loose fur fibers
When cutting your square of artificial fur you will cut through the backing material and some of the fur fibers.
Those fibers will come loose so remove them by simply picking at the edge fibers. Pick off the loose fibers and get rid of them.
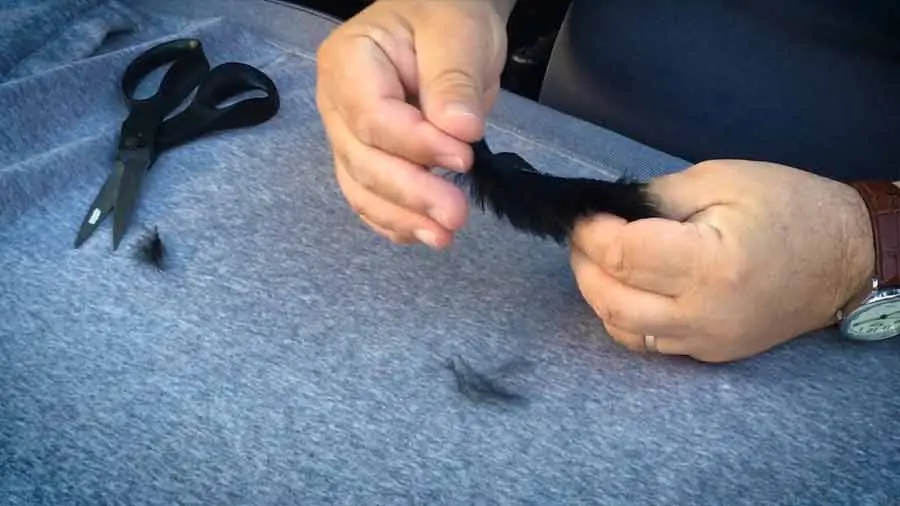
Step 4 – Fold over the material
Fold over the square of material, keeping the fur towards the outside. Bring two opposite edges together.
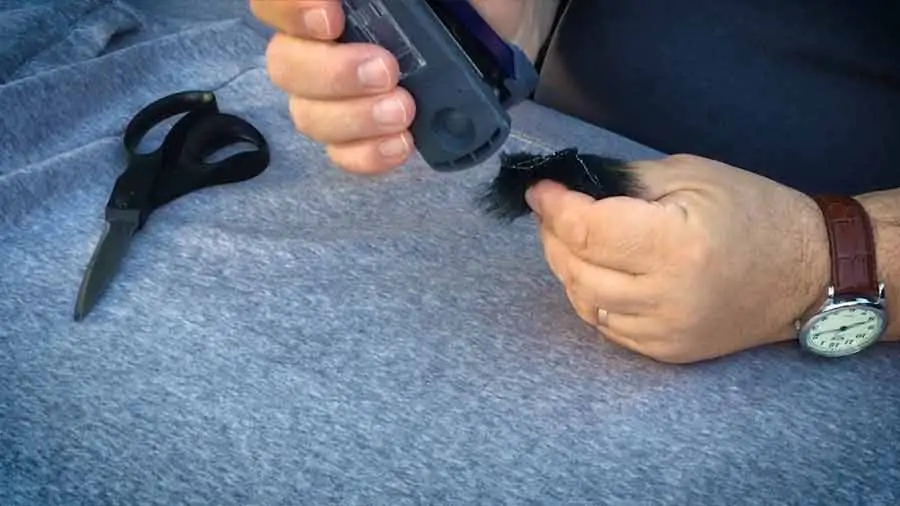
Step 5 – Staple together the two side edges
Pull the fur fibers away from the material’s edge and hold the folded material tightly between the thumb and forefinger. Now staple along the edge of the material.
I used three standard staples along the material edge of my DIY dead cat.
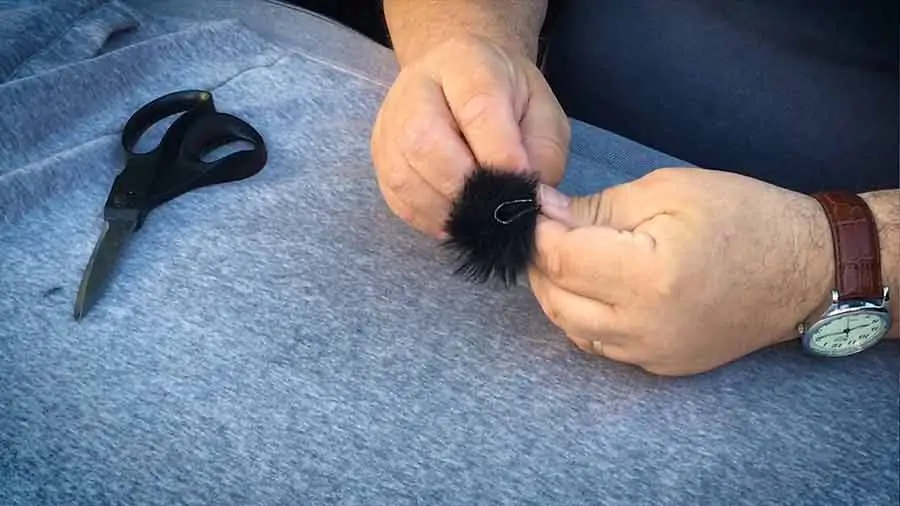
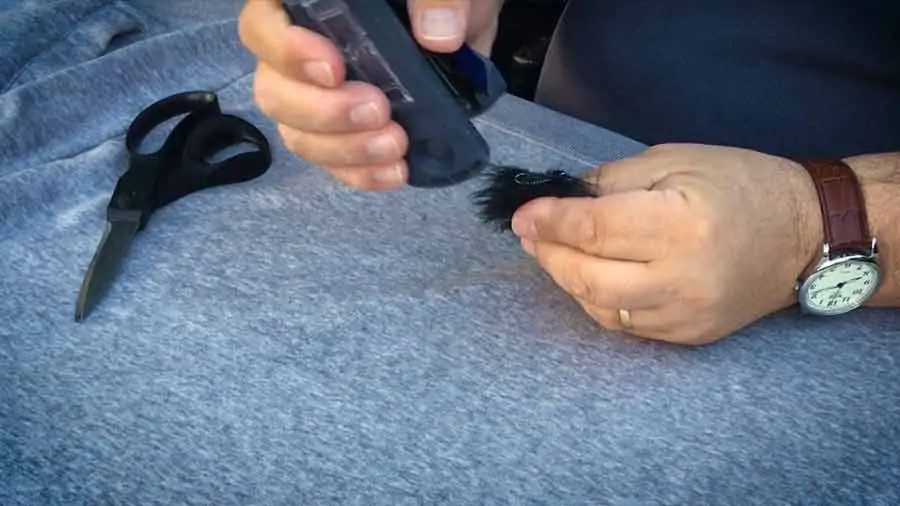
Step 6 – Staple to top edges
Turn the dead cat through 90 degrees. Again, pull back the fur fibers from the material edge and staple the end closed.
Step 7 – Slip the mic capsule into the hole
Turn the DIY Dead Cat around. Give it a little squeeze to open the end and fit the lapel mic into the hole.
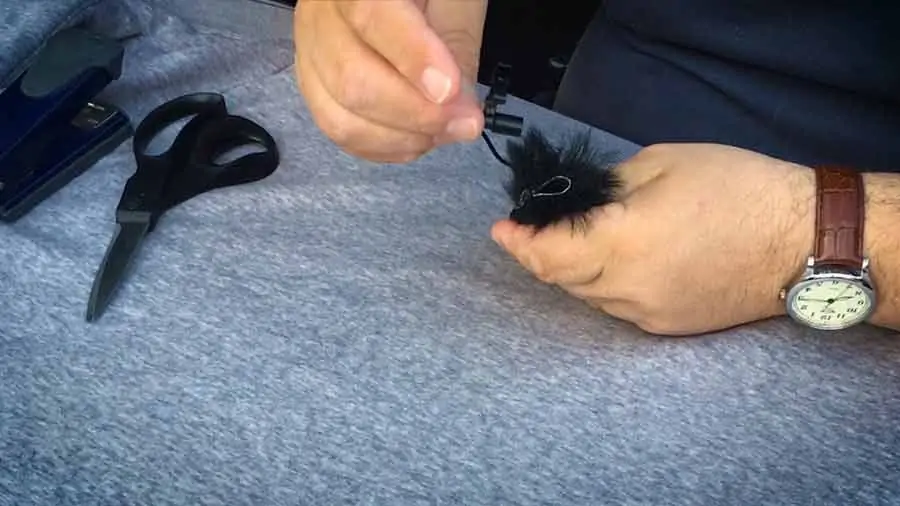
Step 8 – Secure using the mic clip
Unless you make the DIY Dead Cat quite tight so it easily stays in place on the lav mic, use the clip to hold onto some of the fur fibers when you attach the mic to your subject’s clothing. This will keep the DIY Dead Cat in place during the recording.
For a better aesthetic look make sure the join in the fur material is towards the wearer’s clothing.
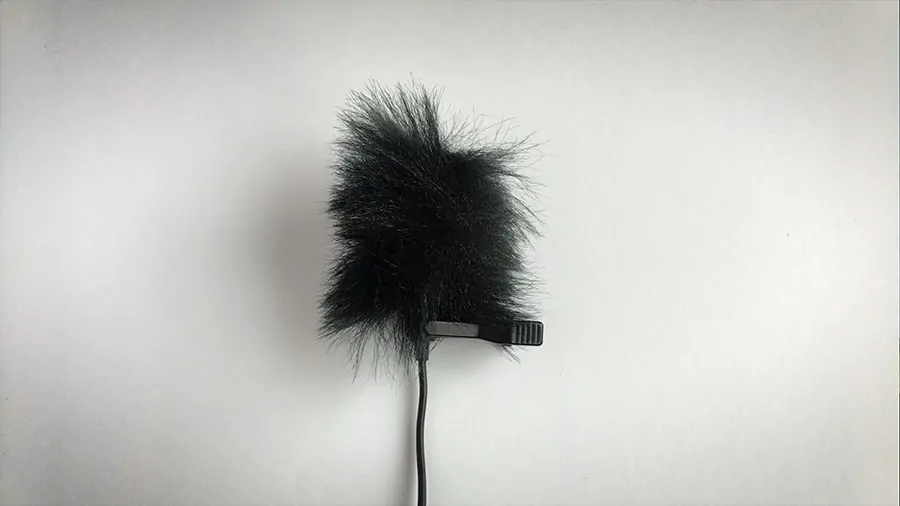
Making a DIY dead cat mic windscreen and the result
If you’d like to watch me making the DIY dead cat windscreen and hear the before and after audio, click on my YouTube video below. You’ll hear exactly how well the DIY fuzzy thing on a microphone works.
You may also be interested in reading how to record outdoors in the wind
Although a dead cat is always going to be useful when you’re recording audio outdoors there are other things you can do to prevent wind noise.
If you would like more details on how to record outside without the wind spoiling your audio recording you may find How To Reduce Wind Noise When Recording Outside?![]() useful. It provides 6 strategies that you can use to ensure your audio sounds good.
useful. It provides 6 strategies that you can use to ensure your audio sounds good.
Pop filter and Dead Cat Mic Windscreen FAQ
What is a shield around a microphone called?
Often called a windshield, pop filter, dead cat, or wind jammer. It protects the microphone’s capsule from fast or energetic air movements, such as wind blasts and plosives in human speech or singing (e.g. words starting with P, B, and T).
Can you use a sock as a pop filter?
Socks can help reduce wind noise and speech plosives by disrupting fast-moving air striking the mic, but they are not recommended. They are not acoustically transparent, leading to the loss of high frequencies, and producing a muddy sound.
Is pop filter necessary?
Not if your mic technique is very good. However, most voiceover talent and singers benefit from having a pop filter on or in front of the microphone. This improves the clarity of speech with plosives, such as words starting with P and B.
Do you need a pop filter for a dynamic mic?
Dynamic mics are less sensitive to pops than condenser mics but dynamic mics, such as the Electro-Voice RE-20 or Shure SM7B can still pop due to plosives, especially on close mic work. Therefore, it is recommended to use a pop filter.
Why do microphones have fur?
The synthetic fur disrupts fast-moving air or wind in outdoor recordings, preventing it from reaching the microphone’s capsule, where it would otherwise cause a “thump” sound in the recording. The fur can also prevent voice pops.
Do I need a pop filter for Blue Yeti?
The Blue Yeti is a condenser microphone, so more sensitive to plosives and wind noise than a dynamic mic. Unless you are very careful, it is highly recommended to use a pop filter, either one that slips over the mic or a mesh windscreen.
Editor’s Note: This article was originally published in August 2019 and has been updated for accuracy and comprehensiveness.
Source: Wikipedia![]()
Tosh Lubek runs an audio and video production business in the UK and has been using the Canon EOS R since it was released in the Autumn of 2018. He has used the camera to shoot TV commercials for Sky TV, promotional business videos, videos of events and functions, and YouTube creator content. He has also won international awards for his advertising and promotional work. You can meet by visiting his “video booth” at HashTag business events across the country.
Recent Posts
Most people use sandbags the wrong way. Here’s how to hang them properly on a light stand for maximum stability and safety — plus what to fill them with.
You're Using the Canon RF 50mm f/1.8 WRONG! Here’s How to Fix It
If you’ve recently picked up the Canon RF 50mm f/1.8 STM—affectionately known as the Nifty Fifty—you might be confused by that strange switch on the side of the lens. It doesn’t say AF/MF...
