

DIY Video Studio is supported by its readers. Please assume links on this site are affiliate links or ads, and that I get commissions for purchases made through these links. As an Amazon Associate, I earn from qualifying purchases. Thank you if you use any of the links.
Vertical video: Do you want to join the revolution
In this article I’m going to show you exactly how to make a vertical video for Instagram.
It’s the method I’ve used for making vertical videos for Instagram, YouTube, and Vimeo for my business clients. The same method works for all these sites. So whichever social media platform you’re uploading to, this is a super-easy guide to get you going.
As a bonus, I’ve included a how-to video at the end of the article that will walk you through the steps.
Step 1: Use the correct frame rate for IGTV
IGTV’s upload requirements![]() for vertical video are as follows.
for vertical video are as follows.
Your video should be an MP4 file of up to 650MB (for video under 10mins). Have an aspect ratio of 9:16. And a frame rate of 30fps.
So, the first thing to do is make sure your camera’s frame rate is correct.
If you live in North America, you probably won’t have to change anything, since you probably are already shooting at 30fps.
If you live in a country where the video standard is PAL, you’ll need to go into your camera’s settings and choose NTSC and select a frame rate of 30fps.
Step 2: Turn your camera through 90-degrees to shoot your footage
The second thing I want you to do is to keep all the pixels you record with your camera. So that means shooting in portrait mode.
If you record horizontally, or in landscape mode, you will have to scale and crop your clip when you bring it into your video editor. That will lower the image quality and waste the potential of your camera’s sensor.
Step 2 is really easy. Turn your camera through 90-degrees.
Looking through the viewfinder, or at the digital display, your video immediately looks vertical.
You can frame your image just the way it will appear in the final video and you won’t lose any precious pixels because you won’t need to crop the side of your video.
There is one slight problem though.
Unlike vertical video that you shoot on your smartphone, your portrait mode video from your video, DSLR or mirrorless camera will play flipped on to its side when watched on your computer or mobile device.
Don’t worry. I’m about to sort that out for you by showing you how to rotate a video and save it in Premiere Pro.
Although I’m using Adobe Premiere Pro the principle is the same for other video editing apps.
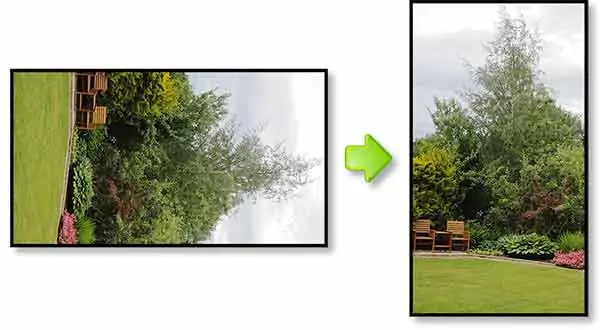
Whatever your video editor, the aim is to go from a vertical video that’s on its side and rotate it 90-degrees counterclockwise. The result is a vertical video you can upload to Instagram’s IGTV.
STEP 3: Create a new sequence in Premiere Pro
Start by doing what you always do when starting a new project in Adobe Premiere.
Create a New Project and give it a name. Then save it in the folder of your choice. You’re now ready to create a new sequence.
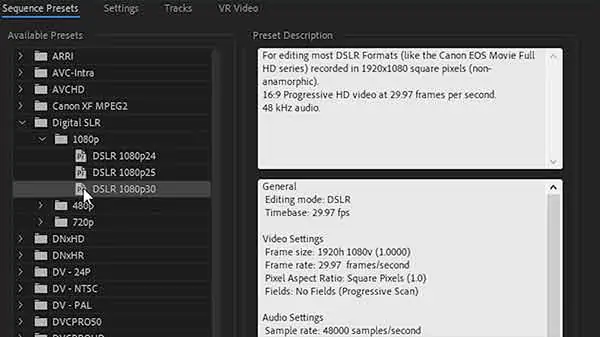
Click on File > New > Sequence, or use the keyboard shortcut of Ctrl + N. Under Sequence Presets in the New Sequence Window, choose the DSLR 1080p30 preset. Then at the bottom of the screen give the sequence a name.
STEP 4: Change the aspect ratio to 9:16
The DSLR 1080p30 preset is just a starting point. So at the top of the window click on “Settings“.
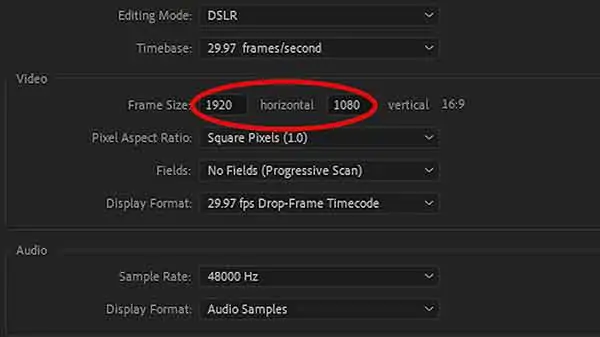
Currently, the Frame size is 1920 x 1080, with an aspect ratio of 16:9. That’s the normal horizontal video frame.
You need to reverse these numbers. Click in the boxes and change the horizontal value to 1080, and the vertical value to 1920. The aspect ratio will automatically change to 9:16.
STEP 5: Name and save as a new preset
Next, click the Save Preset button at the bottom left of the window. The Save Sequence Preset window will open.
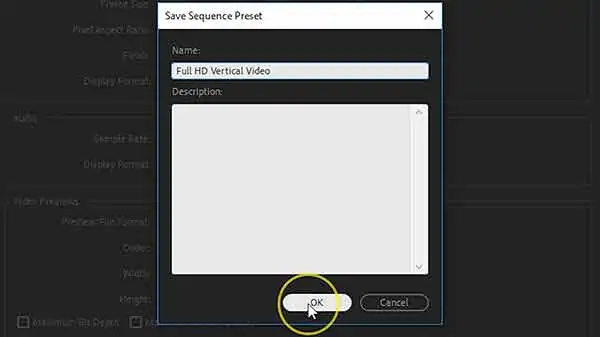
Give the preset a name of your choice. In the screenshot, I have named the preset “Full HD Vertical Video“. You can then click on OK.
STEP 6: Create your new vertical sequence
Your new preset will appear in the Custom folder of your Sequence Presets list.
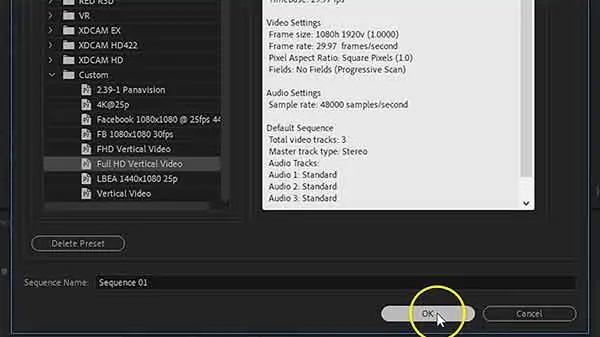
Make sure your new present selected, then click OK to create your new Vertical sequence.
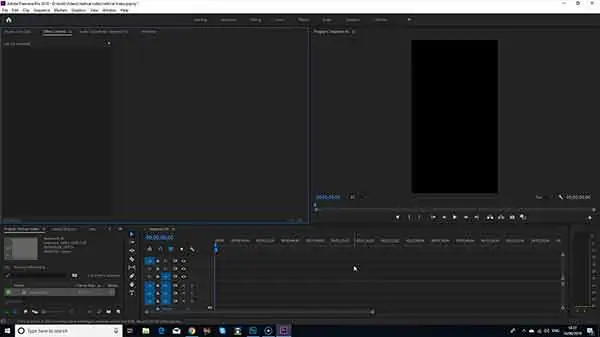
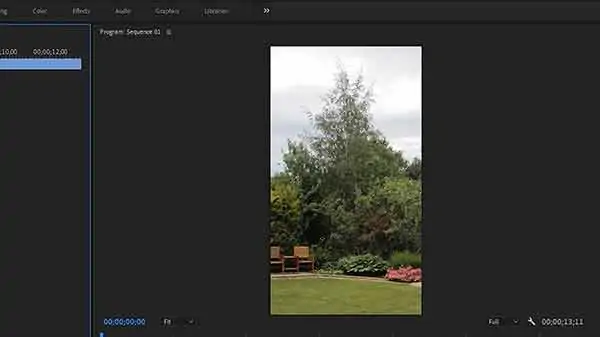
You can see below the monitor window no longer has its familiar widescreen appearance. Instead, you have a tall and narrow frame that is the shape required for Instagram or IGTV vertical video.
STEP 7: Drag your video clip to the timeline
I will assume you have already imported your video footage. So you can now add the clip(s) to the sequence timeline.
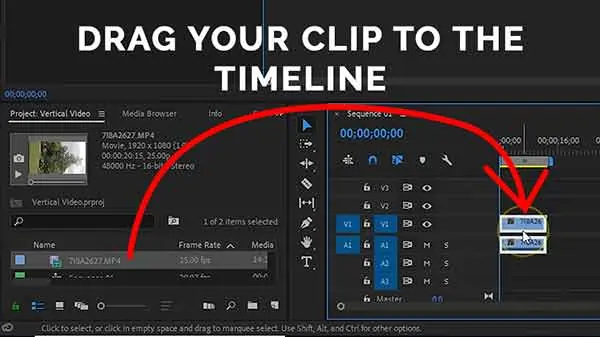
Drag your clip from the project window to the start of the sequence timeline. All simple stuff.
STEP 8: Rotate your clip counterclockwise
When you drag your clip to the timeline it will appear to be on its side. Because the sequence is only 1080 pixels wide, the clip will also appear square. To correct the clip orientation, you need to rotate the clip.
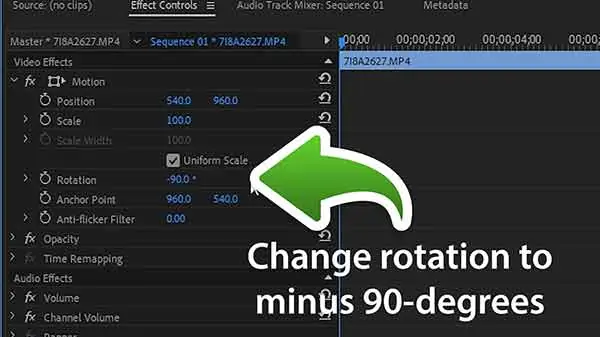
Under the Video Effects, change the Rotation to -90 degrees (or 90 degrees if you shot your portrait mode footage the other way round).
Your clip should now be vertical and does not require any cropping (see the image below). You can now proceed and edit your vertical video.
STEP 9: Create an export preset
When you have finished your editing go ahead and Export your video.
However, you can speed up your future workflow if you first create an export preset.
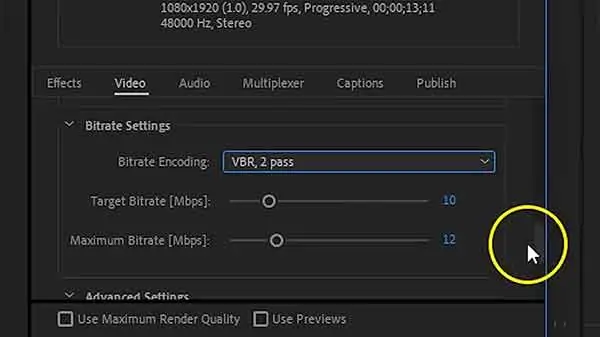
Click on File > Export > Media. When the Export Settings window opens changed the settings as required. For instance, the file format, the bitrate encoding, target and max bitrates.
Once you have made your changes to the settings, the preset name will change to “Custom”.
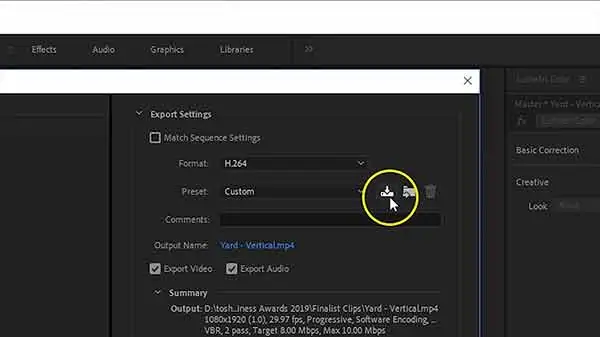
Click on the Save Preset button to the right of the preset name and the “Choose Name” panel will open. Enter an Export Preset name, such as “Vertical Video 30fps”, and click OK.
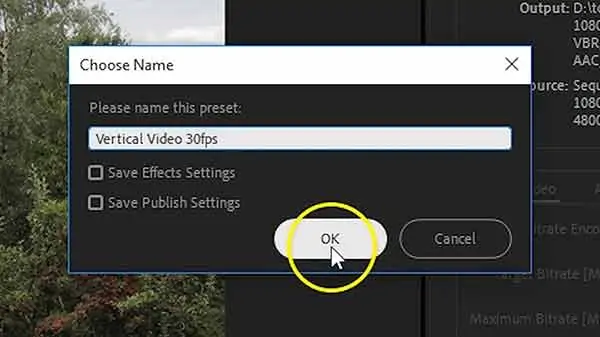
The preset name will change from “Custom” to “Vertical Video 30fps“.
STEP 10: Export your vertical video for Instagram
You’re now at the last step of exporting your video.

At the bottom right of the Export Settings window either click the Queue button to send your video to Media Encoder or click Export to export directly from Premiere Pro.
You’re now done.
You will have learned how to make a vertical video for Instagram. Plus, you will also have learned how to create a sequence in premiere pro, how to save it as a preset, and how to create and save a vertical video export preset.
Well done!
Your video should now be truly vertical and ready to upload to Instagram TV, Facebook, YouTube, and Vimeo. You can see one of my vertical videos below.

I did say right at the start that if you want to watch me walk through those steps again, you can watch my YouTube video. So here it is.
Now it’s your turn
If you’ve found this article helpful, please share it with someone you think might also find it useful. Better still, share it on your social media accounts.
Tosh Lubek runs an audio and video production business in the UK and has been using the Canon EOS R since it was released in the Autumn of 2018 and the Canon EOS R6 in 2020. He has used both cameras to shoot TV commercials broadcast on Sky TV, promotional business videos, videos of events and functions, and YouTube creator content. He has also won several international awards for his advertising and promotional work. You can meet him by visiting his “video booth” at HashTag Business Events across the country.
Recent Posts
Most people use sandbags the wrong way. Here’s how to hang them properly on a light stand for maximum stability and safety — plus what to fill them with.
You're Using the Canon RF 50mm f/1.8 WRONG! Here’s How to Fix It
If you’ve recently picked up the Canon RF 50mm f/1.8 STM—affectionately known as the Nifty Fifty—you might be confused by that strange switch on the side of the lens. It doesn’t say AF/MF...