
DIY Video Studio is supported by its readers. Please assume links on this site are affiliate links or ads, and that I get commissions for purchases made through these links. As an Amazon Associate, I earn from qualifying purchases. Thank you if you use any of the links.
Muslin cloth photography and video backdrops are cheap and effective ways of creating attractive backgrounds. But after folding the backdrop cloth for storage those folds leave a visible grid pattern of creases or wrinkles. If you want an attractive background you need to fix those backdrop wrinkles.
This is how to get wrinkles out of backdrops.
- Spritz the wrinkles with warm water.
- Iron those wrinkles flat.
- Spritz and Iron technique.
- Use a fabric steamer to release the wrinkles.
- Stretch the wrinkles out.
- Blur the backdrop wrinkles by using a shallow Depth of Field.
- Move the backdrop lights so they are almost square on to the backdrop.
Now you know the options, let’s dive into the detail of each method.
Spritz the wrinkles with warm water
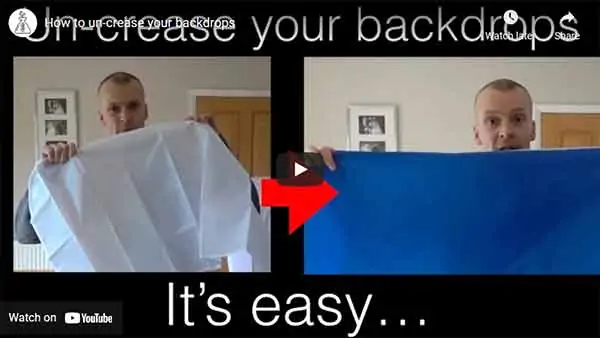
You can find several videos on YouTube where this method is used to remove wrinkles from muslin or cotton cloth backdrops.
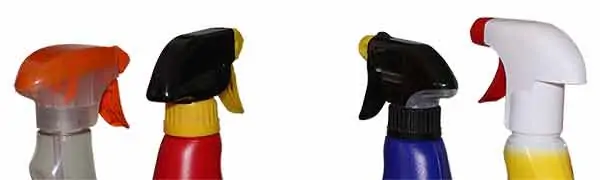
Use a hand spray bottle![]() or the larger pressurized tank spray bottle used for spraying weeds. Whichever type you use, use it with warm water. Obviously don’t use boiling or extremely hot water that could cause burns or scalds.
or the larger pressurized tank spray bottle used for spraying weeds. Whichever type you use, use it with warm water. Obviously don’t use boiling or extremely hot water that could cause burns or scalds.
Some people advise using boiled, distilled, or filtered water to avoid the build-up of limescale staining on the cloth. I live in a soft water region, so I have never bothered filtering my water.
Lightly mist along the crease lines, both vertical and horizontal. If the creases are all over the cloth, then mist the whole area but don’t make the cloth dripping wet. Move slowly over the creases and eventually, you will see them come out as the fibers in the fabric relax. When the backdrop cloth has dried you should see the muslin backdrop has a smooth surface.

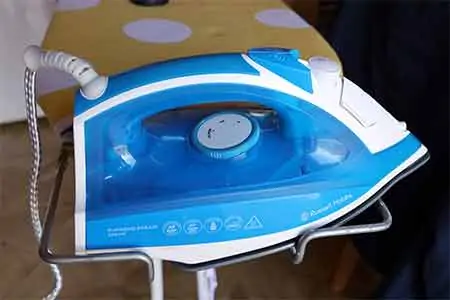
Iron the creases flat with a steam iron
I only use this method if I’m using a small backdrop cloth in a collapsible cube light tent for product shots. In my experience, studio backdrops are too large to be successfully ironed using an ironing board in a small home studio.
Ironing backdrop cloths that are 6x9ft or larger requires care not to crease the parts you’ve already ironed.
If you do iron your backdrop, make sure you have enough floor space in front of you to layout the ironed cloth to avoid putting creases back into the cloth. Also, watch that you don’t give the material surface a shiny appearance. So where possible, use a steam iron![]() and iron the back surface of the cloth.
and iron the back surface of the cloth.
I would use a dry iron when dealing with the small nylon backdrop cloths that typically come with cube light tents. Use the coolest setting on your iron so as not to melt the fabric. If your iron’s temperature dial indicates fabric types, choose nylon or silk.
Spritz and Iron
This is a slightly weird method, but I have seen it done on YouTube.
Hang your backdrop from a standard background support. With one hand spritz the creases with warm water and with the other hand immediately iron those creases in the hanging cloth.
The method in the YouTube video seemed to work surprisingly well, even though there was no solid surface behind the cloth to iron against. In all honesty, the iron mainly provided heat to help quicken the drying of the cloth. Even so, this method did seem to work well.
QUICK TIP: When using the Spritz and Iron method, clamp the sides of your cloth securely to the side supports. This will provide a little resistance when you try to iron the backdrop.
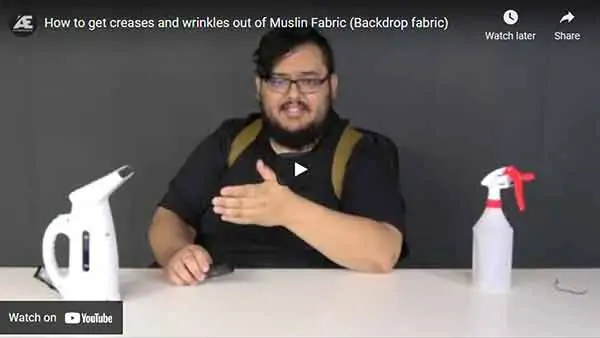
Use a handheld fabric steamer to remove backdrop wrinkles
Handheld fabric steamers are compact, cheap, and often recommended for getting creases out of muslin backdrops.
This is meant to be a quick way of removing wrinkles and creases from muslin backdrops. But when I tried the method, it took me much longer than expected. The reason was simple, I used the wrong type of steamer.

I used a steamer designed for steam cleaning, so it had a single narrow nozzle. Make sure you use a proper fabric steamer, like this one![]() from Amazon. It has a wide outlet head for the steam. Also use boiled, distilled, or filtered water to avoid the build-up of limescale inside the steamer.
from Amazon. It has a wide outlet head for the steam. Also use boiled, distilled, or filtered water to avoid the build-up of limescale inside the steamer.
Hang your cloth from the backdrop support stand as usual. Then work your way along the creases with the fabric steamer. The heated and damp cloth will release and flatten the creases soon after passing over them. Once you have gotten rid of the vertical creases, work on the horizontal ones.
For a smoother look, clamp the cloth between the side stands to apply a small amount of tension to help release the wrinkles.
CAUTION: If you are working in a room fitted with a smoke detector this method may set off the smoke detector. Minimize the risk by opening windows and doors to cause a through-draft or choose another method.
Stretch out the wrinkles
You’ll probably be using a backdrop support system of two side uprights (almost like light stands) and a top crossbar. The crossbar slips through a folded pocket or slot across one side of the backdrop cloth. However, the bottom of the cloth either just hangs or, if long enough, lies on the floor. The weight of the cloth will help stretch it vertically, but you can stretch the cloth slightly horizontally to pull-out minor creases and wrinkles.
Use clamps to fix the sides of the backdrop to the vertical support stands. As you add more clamps pull the cloth and secure it in place.
The main problem is that, unless you buy heavy-duty professional supports, they will bend inwards under the tension. There is a limit to how much tension you can apply, so this method is best reserved for when you have minor creases in your backdrop.
If you do use this method, it’s even more important than usual to add sandbag weights to the legs of your support stands.
An alternative to hanging your cloth from a backdrop support is to pin the muslin cloth to a wall. Using this method allows you to stretch and pin down the length of the cloth and do a reasonable job of removing the wrinkles.
Using a shallow depth of field to fix muslin backdrop wrinkles
If your backdrop doesn’t have major folds and creases you could try blurring those wrinkles by using a shallow depth of field. However, because this method relies on blurring the background rather than removing the creases you may see a tonal variation in your background.
Let’s assume you’re recording a talking-head video where you or your presenter are framed as a medium close-up (head and upper torso). You can forget about using a smartphone unless you’re using a camera app with background blur. A video camera or camcorder may do the trick, but you’ll need to move back and zoom in on your subject. However, your best bet is to use a DSLR or mirrorless camera with a fast lens.
To create blurry backgrounds you can do any, or a combination, of the following.
- Use full aperture on the fastest lens in your collection, i.e. the one with the lowest f-number.
- Use a longer focal length lens.
- Move your subject as far as possible from your background.
So, what does that mean in a real-world situation?
I own three Canon f/1.8 prime lenses, the RF-35mm f/1.8![]() , EF-50mm f/1.8
, EF-50mm f/1.8![]() , and EF-85mm f/1.8
, and EF-85mm f/1.8![]() . Being f/1.8 lenses, they’ll let in plenty of light and produce bokeh (blurry backgrounds).
. Being f/1.8 lenses, they’ll let in plenty of light and produce bokeh (blurry backgrounds).
But remember, longer focal lengths also help in producing a shallower depth of field and blur the background. So, to give me the best chance of blurring the wrinkles in a backdrop my best option is my 85mm lens.
Finally, to maximize the bokeh I can also increase the distance between the backdrop and my subject. The only limit being the size of my backdrop since I don’t want my subject to appear larger than the backdrop.
To summarize, I’d use my mirrorless camera with an 85mm f/1.8 lens at full aperture and place my subject as far in front of the backdrop as possible.
So does this work?
Here’s the result, a before and after screengrab from a talking-head video I shot at a business expo in 2019. In the first image, you can see there are a couple of vertical creases and some wrinkles on the right.

In the second image, once I’d made my adjustments, the creases have been successfully blurred out.

Use flat lighting on your backdrop
Features are defined more clearly by the shadows they cast.
Let me explain what I mean.
When you look at a full Moon, even through a telescope, it’s difficult to clearly see the Moon’s mountains and craters because the sunlight falls square-on, so no shadows are cast. Wait a few days to a gibbous Moon and the sunlight falling on the boundary between the light and dark sides of the Moon now comes from the side. With light from the side any feature above the surface will cast a shadow, making the feature easy to see.
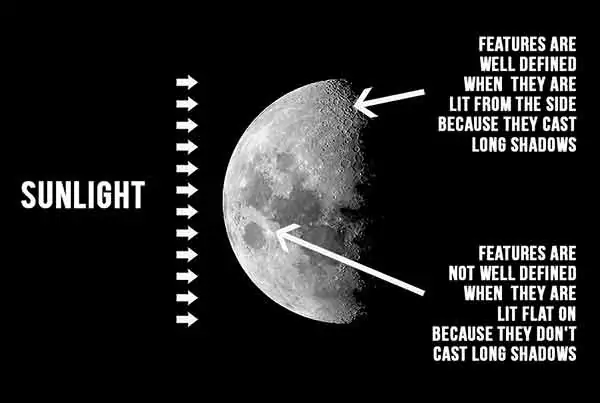
The image shows us different parts of the moon where the sunlight casts no shadow, because the light is square-on, to long shadows, because the sun’s light comes from the side.
We can use the same principle to hide the wrinkles on our backdrop. Instead of placing the background lights off to the sides, bring them in a little towards the camera. That way the wrinkles will cast small shadows and will be more difficult to see.
Try this method when the wrinkles or creases aren’t too bad. Repositioning your lights might just be enough to make them disappear. Alternatively, this technique works well in combination with one of the previous methods.
Related Questions
How big of a backdrop do I need?
A 5 or 6-foot wide backdrop is ideal for a medium close-up talking-head video of one person. If you intend to have a medium close-up of two or three people together a better option would be a 9 or 10ft wide backdrop. If you are shooting against a blue or screen background, go for the larger backdrop. Your presenter can then move away from the backdrop to minimize color spill.
Can you tape a backdrop to a wall?
Both paper and muslin cloth backdrops can be taped to a wall using painter’s tape or masking tape. Both are lightweight, so you shouldn’t have any problem in using tape to secure them to the wall. However, collapsible backgrounds will be too heavy to secure with tape.
How do you store backdrops?
Once you’ve taken the trouble of removing wrinkles from your backdrop, don’t put them back in by folding your backdrop for storage. Roll up your muslin backdrop cloth on a pole. The tube could be cardboard, 1½ inch PVC pipe, or a curtain rod. Roll your backdrop onto the tube/rod, keeping the material tight.
Tosh Lubek runs an audio and video production business in the UK and has been using the Canon EOS R since it was released in the Autumn of 2018. He has used the camera to shoot TV commercials for Sky TV, promotional business videos, videos of events and functions, and YouTube creator content. He has also won international awards for his advertising and promotional work. You can meet him by visiting his “video booth” at HashTag business events across the country.
Recent Posts
Most people use sandbags the wrong way. Here’s how to hang them properly on a light stand for maximum stability and safety — plus what to fill them with.
You're Using the Canon RF 50mm f/1.8 WRONG! Here’s How to Fix It
If you’ve recently picked up the Canon RF 50mm f/1.8 STM—affectionately known as the Nifty Fifty—you might be confused by that strange switch on the side of the lens. It doesn’t say AF/MF...
