
Author: Tosh Lubek Published: 2nd October 2024
DIY Video Studio is supported by its readers who use the affiliate links or ads on this site. As an Amazon Associate, I earn from qualifying purchases. Thank your support if you use any of the links.
“Help! My Blue Yeti Isn’t Working Right!”
That was the urgent message I received from one of my readers who was facing a frustrating issue with his beloved Blue Yeti microphone.
“My Windows computer suddenly stopped recognizing it. Instead of ‘Yeti Stereo Microphone,’ it now shows up in the Sound Settings as ‘USB Advanced Audio Device’. It still works, but the sound is off, almost distorted. Could replacing the cable fix it, or is something else going on?”
At first glance, you might think a loose cable is the culprit. While it’s always a good idea to try a different cable and USB port, since the simple solution might be the answer, I knew there was probably something deeper at play. Putting on my detective hat I scoured the internet and thanks to a video by Mike Rodriguez (aka MikeTheTech) I was convinced the likely suspect was a corrupted firmware.
Understanding the Problem
Blue Yeti microphones are popular with many new YouTubers, provide flexibility, and can provide good audio quality. That’s why it’s so frustrating when they suddenly stop working as expected.
If your Yeti is showing up in your PC’s sound settings as a generic “USB Advanced Audio Device” instead of its proper name, you’re likely dealing with a common issue: corrupted firmware.
While the microphone may still work, the sound quality will be off, and it won’t be fully recognized by your system or the Blue Sherpa or Logitech software.
But don’t worry. If your Blue Yeti has suddenly transformed into a “USB Advanced Audio Device,” don’t panic, there’s a fix. The solution is to flash the microphone’s EEPROM with a working backup file, which restores the firmware and gets your Blue Yeti back to normal.
Although this is more technical than swapping a cable most people should be able to manage it. So, stick around to learn how to get your Blue Yeti back to its full glory! But first, it’s probably worth understanding what the EEPROM is.
What is the Blue Yeti’s EEPROM?
EEPROM or a short way of saying Electrically Erasable Programmable Read-Only Memory. It is a type of non-volatile memory that retains its data even without power.
Unlike regular RAM, it allows data to be read, written, and erased at the byte level, making it ideal for storing small amounts of data like firmware, calibration settings, and device configurations.
Although it is similar to flash memory, the kind that is used in USB drives and SD cards, EEPROM provides greater precision for small-scale data management. Its performance is generally slower and has a smaller storage capacity compared to flash memory. These characteristics make it suitable for applications such as storing the firmware on devices like the Blue Yeti microphone, and it’s that firmware which lets the hardware to perform its magic.
Now you know, let’s get on with the fix.
Download the Software for the Fix
To begin the Blue Yeti firmware recovery process, you will need to use the CM6400 tool, originally intended for use with Samson Technologies Meteor USB microphone from the early 2010s. You will also need a backup of the Yeti’s firmware. You’ll need an internet connection to download both.
The tool can be downloaded from the “Meteor Mic Fix for Windows” page on the Samson Technologies website, where you can download the file labelled Meteor Mic firmware repair.zip. However, you will still need to download a backup of the Yeti’s firmware, so I suggest you visit the About page on MikeTheTech’s website![]() . He provides links to BlueYeti.zip. and Config6400.zip, but you’ll probably only need the BlueYeti.zip download since it contains the firmware backup and the Samson Technologies config tool.
. He provides links to BlueYeti.zip. and Config6400.zip, but you’ll probably only need the BlueYeti.zip download since it contains the firmware backup and the Samson Technologies config tool.
So what’s in the downloaded zip file?
When the download is complete, right click on the zip file and extract the contents. You should find these three files.
- BACKUP_FIRM.bin
- CM_HID7.dll
- Config6400.exe
The .BIN file is the firmware backup while the .dll and .exe files are for the config tool. To be able to use the tool with your Yeti you’ll need a little information, the Vendor ID (VID) and the Product ID (PID) codes for the Yeti before you can proceed with fixing your Blue Yeti microphone.
WARNING: If you downloaded the Meteor Mic fix zip file from the Samson Technologies website DO NOT use the firmware file (.BIN) included with the CM6400 tool. It is intended for the Meteor microphone and not the Blue Yeti.
Finding the VID and PID codes from Device Manager
Mike shows how to find the VID and PID codes in his YouTube tutorial, which you can view here.
Here’s what I did to find those codes.
1: Press Win + X, then select Device Manager in the menu that opens.
2: Scroll down to the Sound, video, and game controllers and click on the arrow on the left to expand the section.
3: In the list that appears, right-click on “USB Advanced Audio Device” and choose Properties.
4: In the window that opens click on the Details tab.
5: Under Property, select Device Description to open the drop-down menu. Scroll down and left click on “Last known parent” to reveal the value, as shown in the following image.

This is where you will find the VID (Vendor ID) and PID (Product ID). I’ve highlighted them in yellow. You need the four characters after the underscore. So, in my example the VID would be 046D and the PID would be 0AB7. In your case these will probably be different, so make sure you check in your Device Manager for the VID and PID values on your PC.
Take a note of the VID and PID values on your computer for the next step. Note that in these codes the first character is a zero and NOT the letter O.
Applying the Blue Yeti Backup Firmware
Ensure the Blue Yeti microphone is connected to your computer using the USB cable, then follow these steps.
- Double-click the Config6400.exe file to run the configuration tool.
- Enter your VID and PID codes in the boxes at the bottom of the configuration tool and click on the Connect button. If you find that the tool does not connect, ensure you have typed the codes in correctly and try again. If you get the message, “EEPROM empty”; press the OK button.
- You may need to wait a moment, but once connected you will see the four buttons across the bottom of the tool will be become available to use. When ready, click on the FILE -> EEPROM button.
A navigation window will open. Find and click on the Yeti Mic firmware bin file called “BACKUP_FIRM.bin” that you downloaded, then press the Open button.
Wait a few moments for the backup firmware to be applied. Eventually a confirmation message will appear, as show below.
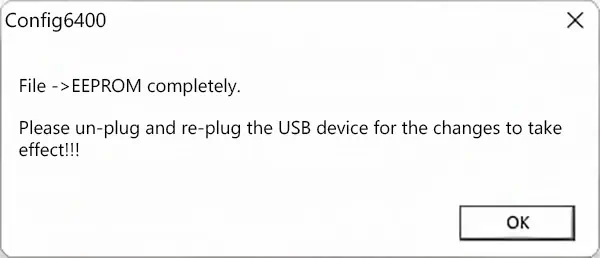
You can now press OK and close the configuration tool.
- To complete the process, unplug and then re-connect the microphone. Windows should now correctly detect the microphone as a Blue Yeti, and it will appear properly in the Sound settings and Device Manager as “Yeti Stereo Microphone”.
If everything appears and functions correctly, the firmware fix has resolved the issue, and your Blue Yeti is back to full working order. But if the microphone isn’t detected, try restarting your computer or reconnecting the microphone to ensure the changes take effect.
Summary and Final Thoughts
If your Blue Yeti USB microphone isn’t being detected properly and appears in the Device Manager and Sound Settings as a “USB Advanced Audio Device,” it’s probable that you will lose some functionality and even audio quality.
By following the steps outlined in Mike Rodriguez’s YoutTube video and reflashing the Yeti’s EEPROM the issues caused by corrupted firmware will be resolved. The microphone’s functionality will be restored, and it should be recognized correctly by Windows.
As a safety measure, you may wish to save the existing EEPROM data to a file before applying the downloaded backup file. Use the EEPROM->File button in the config tool and save the data file to your computer.
To avoid encountering this issue in the future, ensure that your Blue Yeti microphone is always disconnected safely. Furthermore, when applying any firmware updates do not interrupt the process.

About the author: Tosh Lubek is a multi-award-winning broadcaster, writer, and video producer, with 40 years of experience in professional broadcasting and has been using Canon video and stills cameras since 2010. He has worked with radio and TV broadcasters, advertising agencies, and direct clients on a variety of projects including radio and television advertising, online video production, corporate videos, award ceremony motion graphics, and theme park sound design. Tosh has won numerous awards, including a Radio Academy Awards Gold Sony, a Gold, Silver, and Bronze World Medals in the New York Festivals International Advertising Awards. Since about 2007 he has been creating YouTube videos. Tosh has been a sponsor of the “video booth” at HashTag Business Events across the UK.
Recent Posts
You're Using the Canon RF 50mm f/1.8 WRONG! Here’s How to Fix It
If you’ve recently picked up the Canon RF 50mm f/1.8 STM—affectionately known as the Nifty Fifty—you might be confused by that strange switch on the side of the lens. It doesn’t say AF/MF...
Recently, I shot several customer testimonial videos in 4K for a client when the overheating warning on my Canon EOS R6 appeared. In fact, it appeared three times in five sessions during the day of...