DIY Video Studio is supported by its readers who use the affiliate links or ads on this site. As an Amazon Associate, I earn from qualifying purchases. Thank your support if you use any of the links.
When using a lavalier or lapel microphone you have many options when it comes to mic placement. Most lav mics come with an alligator-type clip, which is ideal for attaching the mic to clothing, especially those parts with edges like collars. However, there are also other ways to mount the microphone capsule, these include vampire clips (pins on clothing) and hypoallergenic adhesive tape (sticks to the skin).
Typical lavalier microphone positions include the following:
- About 6-inches down the front of the chest (V. Good sound)
- The lapel of a jacket (Good sound)
- On the neckline of a T-shirt or dress (Good sound)
- Under a shirt collar (Good sound but fiddly and audio can be a little muffled)
- Hairline or on a hat (Good sound but fiddly and can be visible)
- Positioned like a reporter’s handheld microphone (V. Good sound. Not a credible lav mic position)
You’ll also find more information about using lavalier microphones in my related article, How to Wear and Use a Lav Mic.
Lavalier microphone placed on the chest about 6-inches down
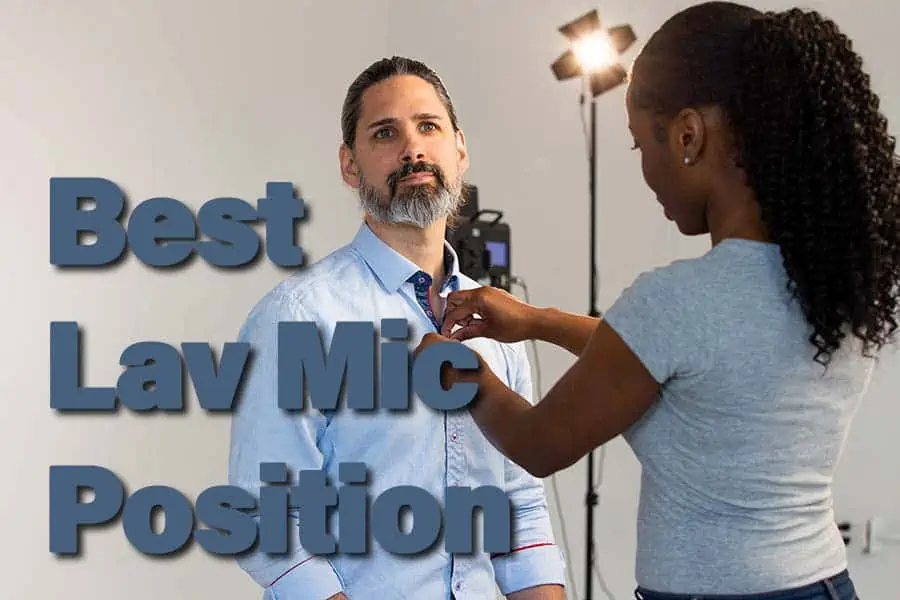
When wiring up most talent, sound professionals place lavalier microphones in the middle of the chest, about 6 inches down from the collar bone. You don’t need to use a tape measure since you can usually eyeball it.
If you do need help in judging the distance, use your thumb and index finger. Point your index finger forward, then move your thumb so it makes a 90° angle with your index finger. Now place your thumb on the collarbone and the tip of your index finger on the breastbone. The position of the tip of your index finger is where you should place the lavalier mic. But don’t get too concerned about getting the distance exactly 6 inches.
The ideal chest position varies from person to person, depending on how deep their voice is. If they have a particularly deep-sounding voice, too much bass can be picked up, making the talent sound a little muddy. But generally, this position will give you the best sound.
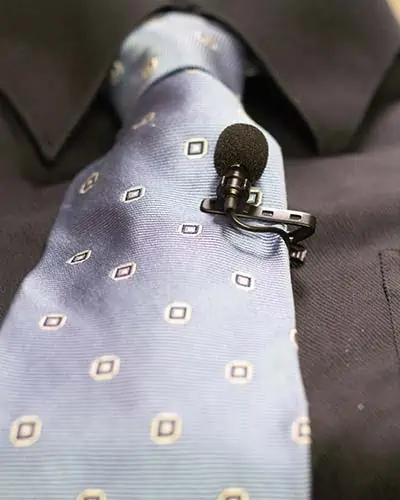
If your talent is wearing a tie, clip the mic capsule to the front or rear of the tie at that 6-inch position.
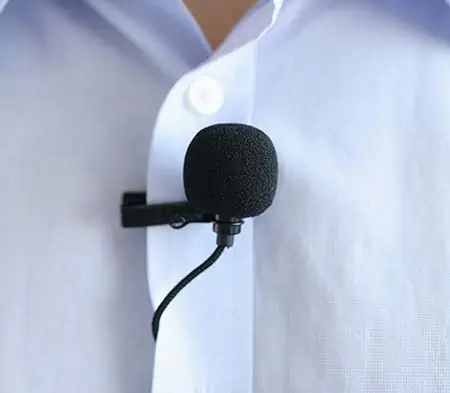
If they are wearing a buttoned shirt, clip the mic to the shirt placket. That’s the front edge of the shirt where the buttonholes are located. It’s usually made of two or three layers of material, making it a firmer base to clip the mic onto. The mic capsule can be placed on the front of the placket, but it can also be placed between the placket and the opposing side of the shirt with the buttons. The beneath-the-placket position provides some wind protection and can hide the lavalier microphone.
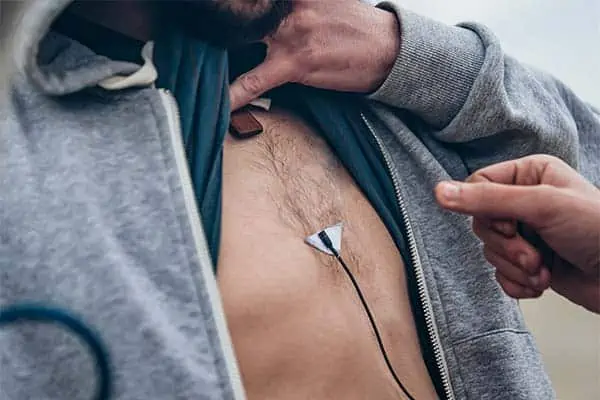
With T-shirts, clipping the mic to the material in the middle of the chest looks untidy as the material gets gathered up by the clip. Alternatively, attach the mic capsule to the skin or to another layer of clothing beneath the T-shirt. For example, a vest or the center part of a bra.
Why placing the mic in the chest area works well
Placing the lav mic in this chest position turns out to be very good, not only because it is forward of the speaker’s mouth, but because the mic is where it can usually pick up the full richness of the speaker’s voice.
Although vocal sounds start with the vibration of the vocal cords, other factors also contribute to the sound of the voice. One of which is the resonance created in the chest. The human chest behaves a little like the body of a violin or guitar. The body of the instrument resonates and helps to amplify and enrich the sound of the vibrating strings. The human chest does something similar to our voices.
Among singers, chest voice refers to the mid and lower range of the human voice, which is also the range normally used when speaking. Obviously, the sound of the voice doesn’t come solely from the chest, the resonance enhances the sound. If you place the palm of a hand just below the collar bone and flat on your chest, you can feel these mid to low-frequency vibrations when you count aloud from one to three or even say “Ahhhh”. You’ll find the effect is more pronounced when you speak a little louder and with a deeper tone.
By placing an omnidirectional lavalier microphone on the chest and about 6-inches down from the collar bone, it will not only pick up the higher tones from you’re your mouth and head, but also those amplified mid and lower tones from the chest. In most cases, this results in a rich vocal sound.
Lavalier microphone clipped to the lapel of a jacket
The lapel of a jacket is a popular position to attach a lavalier microphone. In fact, lavalier microphones are also known as lapel mics since this has long been a popular mounting position. The reason is that the sound is good and the microphone is easy to attach. This microphone position is correct, provided the speaker does not turn their head to the opposite side.
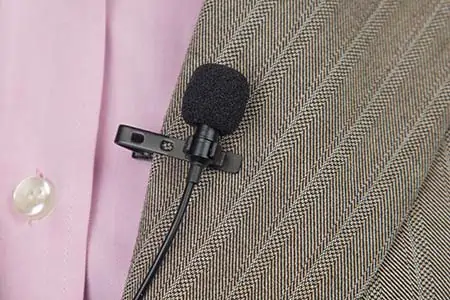
Jacket lapels also make a firm base to attach the microphone with an alligator clip mount, so that it isn’t going to move and cause clothing to rustle. Furthermore, the cable can be taken around to the inside of the jacket, making the microphone look tidy.
Clearly, this mounting position relies on the talent wearing a jacket, which these days tends to be more formal. I can remember my father and grandfather wearing jackets when gardening but today jackets tend to be worn in more formal settings. These include weddings, interviews, broadcasting, and business, although even here jackets are not always the norm.
When wiring up the talent, the aim is to have the microphone capsule about 6-8 inches from their mouth. In an interview situation, attach the microphone to the lapel nearest the other speaker since your talent will tend to turn their head in that direction.
Lavalier microphone on a dress or T-shirt neckline collar
This position produces good sound. The microphone capsule is almost on the chest, so it can pick up some of that “chest voice”, and it can be positioned in the center or off to one side if required. Usually, an alligator microphone clip is used. This results in the mic capsule being almost horizontal.
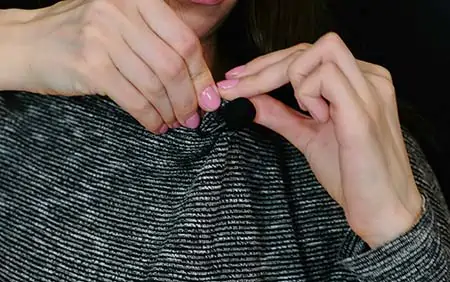
However, this does not matter since most lavalier microphones are omnidirectional and pick up sound from the sides as well as they do from the front. The downside is that you might find the look a little untidy. If that’s the case tape the mic capsule to the inside of the dress or T-shirt, with the top level with the neckline.
Whichever way you attach the microphone, feed the cable under the clothing to keep things looking neat.
Lavalier microphone attached under a shirt collar
Because many of us wear our shirts or blouses unbuttoned, the position of the collar tends to be off to the side of the face and therefore away from the speaker’s mouth. In my experience, the recorded sound ends up being a little muffled and I must apply extra processing to the audio. If the collar is buttoned up, the microphone will be closer to the front and in a better position to pick up good sound.
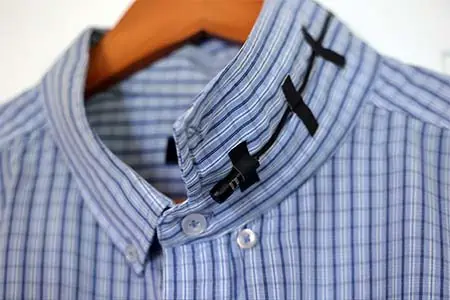
I would only use this position for a lavalier microphone if I needed to hide the mic and if the collar was buttoned. Nonetheless, this position does work. Because the microphone is to one side of the face, avoid using this location if your talent needs to move their head around, otherwise, their audio level will go up and down depending on where they are looking.
Where this microphone position does work well is in an interview situation, where the speaker has their head turned toward the other person and the same side as the microphone.
To attach the microphone, you don’t need the alligator clip that comes with most lavalier microphones. Instead, tape the mic capsule to the underside of the collar, and have it as far forward as possible without being seen. If you’re careful, and the material won’t be damaged by pins, you can use dressmaking pins to go partly in and out of the collar, over the mic cable, and in and out of the collar again on the other side of the cable. A couple of pins should be enough to hold the microphone in place.
The cable can follow the inside of the collar to the back of the neck, use tape to keep it in place, then drop the cable down to your wireless bodypack or off to your audio recorder.
Lavalier microphone is hidden in hair or on a hat
These microphone positions can sound good and work well when shooting with wider shots. But the microphone is often visible in a typical medium close-up shot, like a piece-to-camera shot, especially if you have short hair.
A similar position is to attach the lavalier microphone on your spectacles if you wear any. The problem here is that lavalier microphones with small microphone capsules tend to be expensive. Lavalier microphones used by typical YouTubers and TikTokers are too big to hide on your spectacles.
Another problem with having the microphone hidden on a hat is that we don’t wear hats as much as folks did more than 50 years ago. The only wide-brimmed hat I have is for my outdoor activities like hiking, fishing, and gold panning. In the winter I might wear a knitted woolen hat. I wouldn’t wear either of them in a YouTube video.
Hiding the microphone on the underside of the brim of a hat can work well, but honestly, wiring it up is a lot of work and only worthwhile if the microphone must be invisible. If you do want to use this microphone location, secure the microphone capsule in place with tape or pins.
Holding a lavalier microphone like a reporter’s handheld mic
Some people call this the TikTok lavalier microphone position because some people on TikTok hold the metal clip of their lav mic and have it in front of them. I’ll admit this position is great for capturing good sound, possibly even better than the chest position. But it looks dreadful and amateurish.
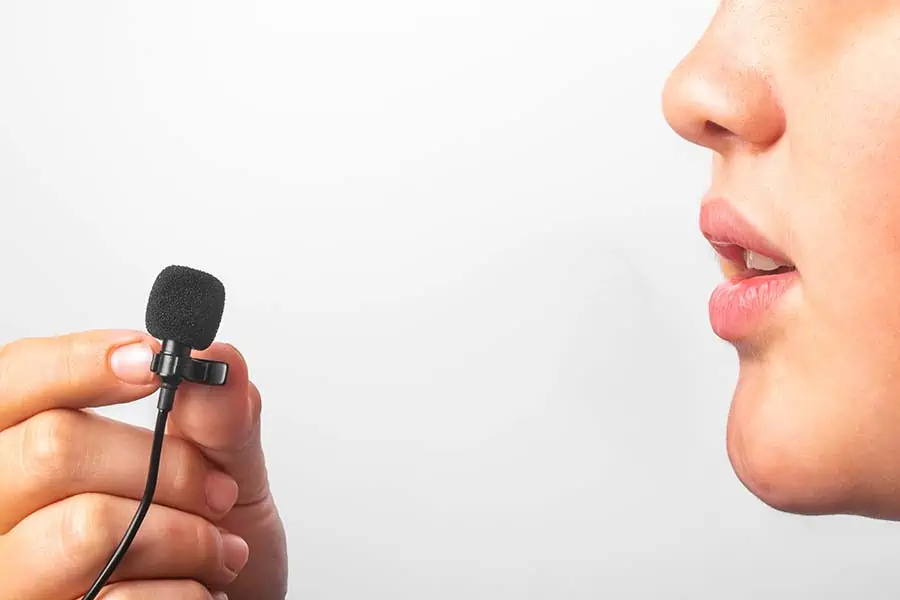
If you need to hold a microphone in front of you, get a handheld dynamic microphone with a cardioid polar pattern and have it 6-8 inches away from the mouth. It will look professional, pick up your voice clearly, and be effective at cutting some of the background noise. Another option is to get a headset type of microphone.
Holding a lavalier microphone in front of you is neither a practical nor a credible way of using this type of microphone. Moreover, it nullifies one of the advantages of lavalier microphones, a lav mic frees up your hands so you can behave more naturally or demonstrate how to do something with your hands.
However, I can understand why people hold a lavalier microphone. A reasonable handheld mic costs from $70-$100, while a budget lapel microphone, which sounds OK, costs about $15.
If you’re looking for an inexpensive lapel mic or handheld mic here are some links to some good microphones for YouTube that I found on Amazon.
Last update on 2025-10-20 / Affiliate links / Images from Amazon Product Advertising API
Summary
In this article, I’ve covered six different ways of positioning a lavalier microphone, although some can be varied to provide even more positions.
Typically, the best position for online video is about 6-inches down your chest, on a jacket lapel, or on the neckline of a dress or T-shirt. If you need to hide the lavalier microphone, it can be secured under a shirt, behind a tie, or on the underside of a shirt collar.
Tosh Lubek runs an audio and video production business in the UK and has been using the Canon EOS R since it was released in the Autumn of 2018 and the Canon EOS R6 in 2020. He has used both cameras to shoot TV commercials broadcast on Sky TV, promotional business videos, videos of events and functions, and YouTube creator content. He has also won several international awards for his advertising and promotional work. You can meet him by visiting his “video booth” at HashTag Business Events across the country.
Recent Posts
Most people use sandbags the wrong way. Here’s how to hang them properly on a light stand for maximum stability and safety — plus what to fill them with.
You're Using the Canon RF 50mm f/1.8 WRONG! Here’s How to Fix It
If you’ve recently picked up the Canon RF 50mm f/1.8 STM—affectionately known as the Nifty Fifty—you might be confused by that strange switch on the side of the lens. It doesn’t say AF/MF...


